
Table of Contents
Did you know that nearly 90 percent of all houseplants can be propagated at home with simple tools and careful techniques? Plant propagation offers a rewarding way to grow your collection and share favorites with friends while saving money. Identifying plant types and using the right methods sets the foundation for healthy, new growth and long-term success, whether you’re caring for soft herbs or woody shrubs.
Quick Summary
| Key Point | Explanation |
|---|---|
| 1. Assess Plant Types before Propagating | Understand specific plant characteristics to choose appropriate propagation methods. Different plants require different techniques for success. |
| 2. Gather Essential Propagation Tools | Prepare tools like sharp scissors and rooting hormones to ensure a smooth propagation process. This setup promotes healthy new plant growth. |
| 3. Select Healthy Propagation Material | Use vigorous, disease-free cuttings for maximum rooting potential. Make clean cuts and properly prepare materials for optimal growth conditions. |
| 4. Monitor Growth Regularly | Check cuttings for root development and ensure appropriate moisture control. Observing plants helps to identify any issues early on. |
| 5. Confirm Rooting Success Before Transplanting | Gently tug on cuttings to test for strong roots and signs of growth. Correct timing ensures successful establishment in a new environment. |
Step 1: Assess Plant Types and Gather Tools
Successful plant propagation starts with understanding your specific plant types and preparing the right tools for the job. According to the Royal Horticultural Society, selecting appropriate propagation methods depends on carefully evaluating your plant’s unique characteristics and growth patterns.
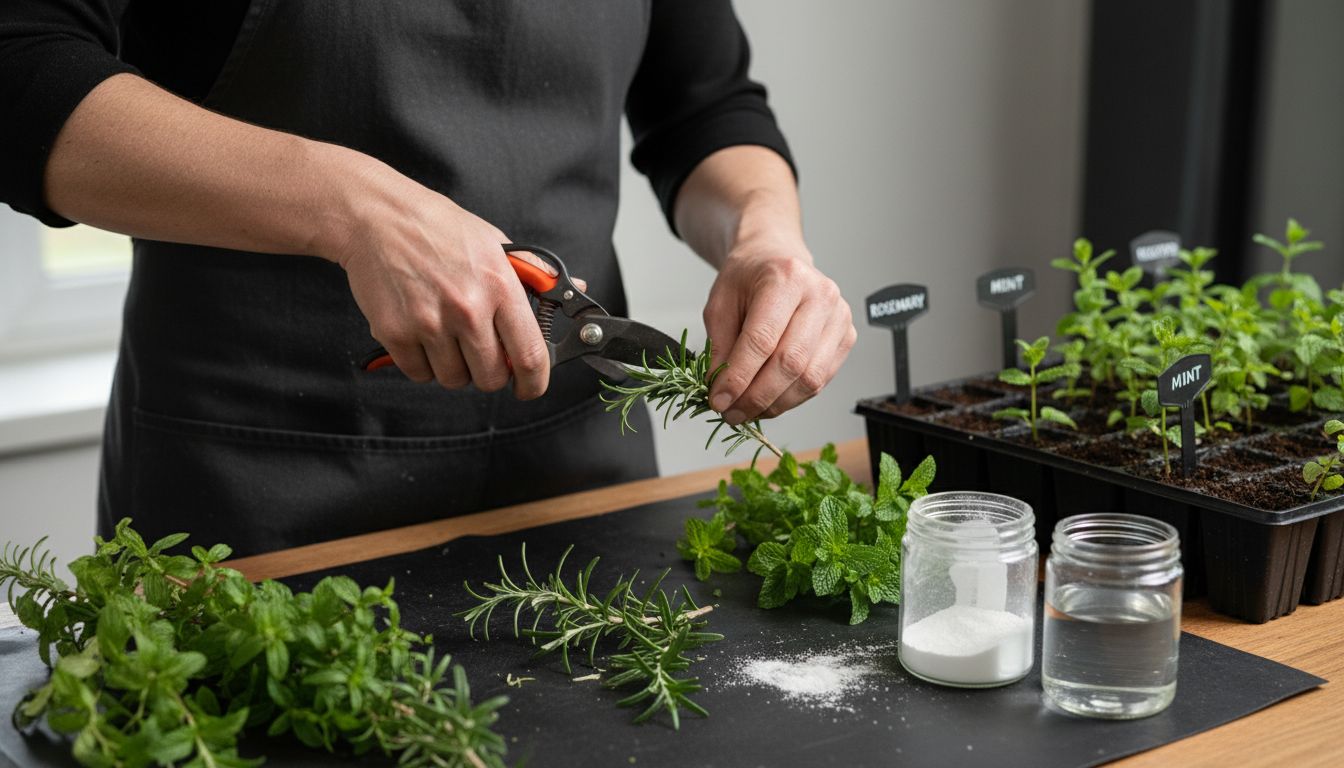
To begin your propagation journey, first categorize your plants based on their reproduction potential. Different plant families require distinct approaches some root easily from cuttings while others demand more specialized techniques. Soft stemmed plants like basil and mint typically propagate quickly through stem cuttings. Woody perennials such as rosemary might need rooting hormone and more precise environmental controls. You’ll want to gather tools specific to your plant type including sharp pruning shears clean cutting surfaces rooting trays and optional rooting hormones. A basic propagation toolkit should include:
- Clean sharp pruning scissors
- Rooting hormone powder or gel
- Sterile potting mix
- Small containers or propagation trays
- Clear plastic bags for humidity control
- Spray bottle for gentle moisture management
As recommended by Wikipedia, maintaining sterile conditions is crucial especially when working with more delicate plant species. Sanitize all your tools with rubbing alcohol before beginning to prevent potential disease transmission. This preparation sets the stage for the next step in your plant propagation adventure ensuring the highest probability of successful root development and healthy new plant growth.
Step 2: Select and Prepare Propagation Material
The key to successful plant propagation lies in carefully selecting and preparing your propagation material. According to Wikipedia, plant cuttings involve using a specific piece of a plant that will develop roots and grow into a new independent organism.
When selecting propagation material, focus on choosing healthy vigorous stems or branches from the parent plant. Look for sections that are disease free with no visible damage or pest infestation. For stem cuttings select segments that are approximately 4 to 6 inches long with multiple leaf nodes. Woody plants often require slightly different techniques compared to herbaceous plants. As noted in Wikipedia, some propagation methods like layering allow you to encourage root development while the stem remains attached to the parent plant.
Prepare your selected material by making clean precise cuts at a 45 degree angle using sterilized sharp pruning shears. Remove lower leaves from the cutting leaving only a few at the top to minimize moisture loss. For woody plant cuttings you might want to scrape a small section of bark on the bottom to stimulate root growth. If using rooting hormone apply it carefully to the cut end before placing the cutting in your prepared propagation medium. This meticulous preparation sets the foundation for successful root development and ensures your new plant starts its journey with the best possible advantages.
Step 3: Apply Effective Propagation Techniques
Mastering plant propagation requires understanding and applying the right techniques for different plant types. Wikipedia highlights grafting as a sophisticated method that combines material from one plant with the roots of another plant creating unique opportunities for plant reproduction.
For successful propagation start by choosing the most appropriate technique based on your specific plant type. Softwood cuttings work best for plants with green flexible stems like mint and basil. Hardwood cuttings are ideal for woody perennials such as roses and shrubs. When working with stem cuttings ensure you make clean cuts just below a leaf node and remove any lower leaves. Some advanced techniques like layering allow you to encourage root development while the stem remains attached to the parent plant.
As noted by Wikipedia, micropropagation represents a more specialized technique for rapidly multiplying plant stock. This method involves carefully controlling environmental conditions and using sterile tissue culture techniques. Professional gardeners often use this approach for rare or challenging plant species. Regardless of the method you choose maintain consistent moisture and temperature control.
 Keep your propagation area warm humid and protected from direct sunlight. Monitor your cuttings regularly checking for signs of root development and removing any sections that show signs of decay. Patience is key some plants root quickly while others may take several weeks to establish new growth.

Step 4: Monitor Growth and Troubleshoot Issues
Successful plant propagation requires careful and consistent monitoring to ensure your new plants develop strong roots and healthy growth. Emerging technologies are transforming how gardeners track plant development with advanced techniques like machine vision systems that provide precise growth assessments.
Begin monitoring your propagated plants by checking root development every few days. Look for signs of new growth including tiny white root tips emerging from cutting bases or increased leaf vigor. Pay close attention to moisture levels keeping the propagation medium consistently damp but not waterlogged. Watch for potential issues such as yellowing leaves fungal growth or wilting which could indicate environmental stress or root problems. ArXiv highlights how modern monitoring techniques can help gardeners detect subtle changes in plant health before they become significant problems.
Common troubleshooting challenges include preventing mold growth maintaining appropriate humidity and managing temperature fluctuations. If you notice any sections of your cuttings turning brown or soft immediately remove those pieces to prevent potential disease spread. Maintain a consistent environment with temperatures between 65 and 75 degrees Fahrenheit and humidity levels around 70%. Most propagation attempts take between 2 to 8 weeks for successful rooting so patience and careful observation are your greatest tools in nurturing these delicate new plant starts. Your dedication during this critical growth phase will determine the long term success of your propagated plants.
Step 5: Verify Rooting Success and Transplant
The final stage of plant propagation is determining when your new plants are ready to be transplanted into their permanent growing environment. According to Wikipedia, successful rooting is primarily indicated by new growth and visible root development emerging from your original cutting.
To verify rooting success gently tug on your cutting to test root resistance. A well rooted cutting will feel slightly anchored and show resilience when lightly pulled. Look for additional signs of successful propagation including new leaf growth emerging from the cutting or visible white root tips extending from the base of your propagation medium. Wikipedia explains that some propagation methods like layering allow roots to develop while still connected to the parent plant providing an additional method of ensuring root establishment.
When transplanting your newly rooted plants choose a pot slightly larger than the current root system with excellent drainage. Use a high quality potting mix that matches your specific plant type. Carefully remove the rooting cutting from its original medium ensuring you minimize root damage during the transfer. Water thoroughly after transplanting and place in an appropriate light environment matching your plant species requirements. For master plant propagation techniques, remember that patience and gentle handling are key to successfully establishing your new plant in its permanent home.
Unlock Your Garden’s Potential with Expert Propagation Support
Mastering plant propagation can feel overwhelming when facing challenges like selecting the right cutting, maintaining ideal humidity, or ensuring successful root growth. This article highlights critical steps such as using rooting hormone, monitoring moisture, and verifying root development that every gardener encounters. If you want to move beyond trial and error toward thriving plants and flourishing gardens, you need practical guidance tailored to your needs.
Discover the essential Plant Care tips and Gardening Tips that make a real difference in your propagation journey. Whether you are rooting softwood cuttings or experimenting with layering techniques, Lushy Gardens offers detailed insights and trusted advice crafted by passionate experts. Don’t wait for your next project to struggle. Start growing confident and successful plants today by visiting Lushy Gardens for all the tools and knowledge you need.

Frequently Asked Questions
What is the best way to select propagation material for plant propagation?
To select propagation material effectively, choose healthy stems or branches that are free from disease and damage. Look for sections that are 4 to 6 inches long with visible leaf nodes.
How can I ensure successful rooting when propagating plants?
Ensure successful rooting by using clean cuts at a 45-degree angle and applying rooting hormone before placing the cutting in a proper propagation medium. Maintain consistent moisture and temperature for optimal growth.
What common issues should I monitor while propagating plants?
While propagating plants, monitor for yellowing leaves, wilting, or signs of mold, which can indicate environmental stress or root issues. Check moisture levels regularly and remove any decayed sections immediately to prevent disease spread.
How do I know when my propagated plants are ready for transplanting?
Your propagated plants are ready for transplanting when you notice new leaf growth or can feel root resistance when gently tugging on the cutting. Look for visible root tips emerging from the propagation medium to confirm successful rooting.
What should I do immediately after transplanting my newly rooted plants?
After transplanting, water your newly rooted plants thoroughly to help them establish in their new environment. Choose a pot slightly larger than the root system, ensuring it has good drainage for best results.
How long should I expect it to take for my plants to root during propagation?
Most plant propagation attempts take between 2 to 8 weeks for successful rooting, depending on the plant type. Be patient and monitor your cuttings regularly as they develop.
Recommended
- Master Plant Propagation Techniques for Thriving Gardens – Lushy Gardens
- Mastering Propagating Houseplants: A Complete Guide – Lushy Gardens
- How to Propagate Snake Plant: Step-By-Step Guide for Thriving Plants – Lushy Gardens
- How to Propagate Jade Plant – A Comprehensive Guide – Lushy Gardens

I’m Eleanor, a seasoned gardener with over three decades of experience tending to Mother Nature’s creations. Through Lushy Gardens, I aim to share my wealth of knowledge and help fellow plant enthusiasts uncover the wonders of gardening. Let’s dive into this journey together, one leaf at a time.


