
Table of Contents
Over 80 percent of American gardeners face their biggest challenges before the first perennial is even planted. The foundation of a thriving garden depends on assessing your unique space and soil—a step many skip in their excitement. Taking the time to observe and understand these details sets the stage for lush, resilient growth and can dramatically reduce wasted time and money. This guide shares key strategies to help you confidently plan your perennial garden for long lasting beauty and success.
Quick Summary
| Key Insight | Explanation |
|---|---|
| 1. Assess your garden’s environment | Understanding sunlight, soil type, and drainage patterns is crucial for selecting suitable plants. |
| 2. Choose appropriate perennials | Select plants that thrive in your specific climate and soil conditions, prioritizing native species. |
| 3. Design an effective layout | Use a rough sketch to organize plants by height and spacing for visual depth and healthy growth. |
| 4. Prepare soil thoroughly | Create a nutrient-rich soil environment by removing debris and incorporating organic matter. |
| 5. Maintain your garden consistently | Regularly monitor plant health and apply appropriate watering, pruning, and pest management strategies. |
Step 1: Assess your garden space and soil
Successful perennial garden planning begins with understanding your garden’s unique environment. Knowing your space and soil composition is crucial for selecting plants that will thrive and create a beautiful landscape.
Start by carefully observing your garden’s characteristics, focusing on key factors like sunlight exposure, soil type, and drainage patterns. Soil testing provides critical insights into your garden’s foundation. Walk your garden space during different times of day to track sun and shade patterns, which directly impact plant selection. Some areas might receive full sun for 6-8 hours, while others remain partially shaded.
Carefully assess your soil’s texture and composition by performing a simple hand test. Grab a handful of soil and squeeze it. If it holds together and feels somewhat sticky, you likely have clay soil. If it falls apart quickly, you probably have sandy soil. Loamy soil, which gardeners consider ideal, will hold a loose shape but crumble easily. Understanding your soil type helps you choose perennials that will naturally adapt to your garden’s specific conditions.
Pro tip: Before investing in expensive plants, create a rough garden sketch noting sun exposure, potential planting areas, and existing landscape features. This visual guide will help you plan your perennial garden more effectively and prevent costly mistakes.
Step 2: Select suitable perennial plant varieties
Selecting the right perennial plants is a critical step in creating a thriving garden landscape that will bring beauty and vitality year after year. Understanding plant characteristics and your garden’s specific conditions will help you make informed choices that ensure long term success.
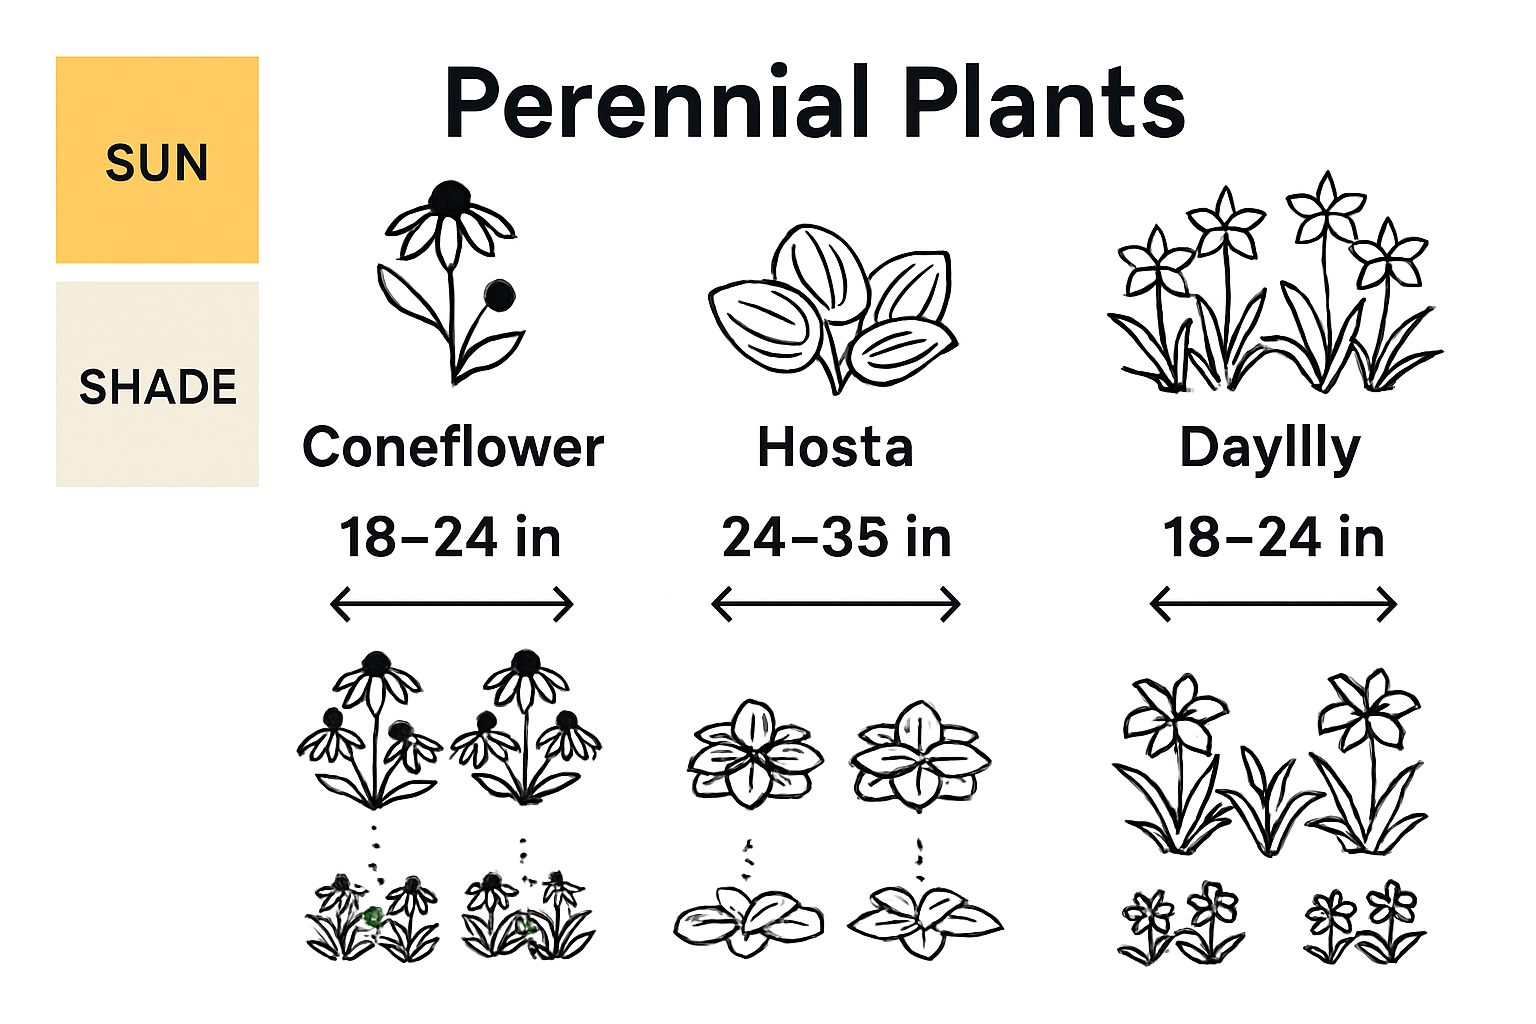
Start by exploring perennial varieties that match your garden’s unique environment and climate zone. Look for robust plants with healthy root systems and foliage. Experienced gardeners recommend selecting plants with strong stems, no visible damage, and vibrant green coloration. Consider factors like bloom time, height, and color to create visual interest and ensure continuous flowering throughout the growing season.
When choosing perennials, prioritize plants that are well suited to your specific microclimate and soil conditions. Some perennials thrive in full sun, while others perform best in partial shade. Pay attention to each plant’s specific requirements for water, sunlight, and soil type. Native perennial species often adapt more easily to local conditions and require less maintenance. Research plant hardiness zones and select varieties that can withstand your region’s temperature extremes.
Pro tip: Create a garden design that incorporates perennials with staggered blooming periods. This strategy ensures your garden remains colorful and engaging from early spring through late autumn, providing continuous visual interest and supporting local pollinators throughout the growing season.
Step 3: Design your perennial garden layout
Designing a thoughtful perennial garden layout transforms your outdoor space from a simple landscape into a living canvas that evolves beautifully throughout the seasons. This critical planning stage determines how your garden will look and function for years to come.
Start by creating a rough sketch of your garden space, using simple garden design principles to guide your approach. Consider the mature size of each perennial variety and strategically place taller plants toward the back of garden beds, with shorter varieties in front. This layering technique creates visual depth and ensures every plant receives adequate sunlight and air circulation. Group plants with similar water and sunlight requirements together to simplify maintenance and promote healthy growth.
Pay careful attention to plant spacing and distribution. Perennials need room to spread and develop robust root systems. Avoid overcrowding by understanding each plant’s expected width and growth pattern. Aim to create visual rhythm by repeating similar plant groups throughout the garden, which helps create a cohesive and harmonious design. Consider incorporating a mix of textures, heights, and bloom times to ensure your garden remains interesting and dynamic throughout different seasons.
Pro tip: Before finalizing your garden layout, use garden stakes or temporary markers to visualize plant placement. This allows you to experiment with different arrangements and make adjustments before committing to a final design, helping you create a more balanced and visually appealing perennial garden.
Step 4: Prepare planting beds and improve soil
Successful perennial gardens start with healthy, well prepared soil that provides the essential nutrients and optimal growing conditions for your plants. This foundational step determines the long term success and vitality of your garden landscape.
Begin by preparing garden beds naturally, focusing on creating a nutrient rich environment. Remove existing grass, weeds, and debris from your chosen planting area. Use a garden fork or tiller to loosen soil to a depth of 12 to 15 inches, which allows perennial roots to penetrate easily. Incorporate organic matter like compost, aged manure, or leaf mold to improve soil structure, drainage, and nutrient content. This process helps create a fertile foundation that supports robust plant growth and resilience.
Carefully assess your soil composition and conduct a soil test to understand its pH and nutrient levels. Different perennial plants thrive in different soil conditions, so knowing your soil type helps you make informed amendments. Sandy soils benefit from added organic matter to improve water retention, while clay soils require amendments that enhance drainage and prevent compaction. Consider adding perlite or coarse sand to improve soil texture and prevent waterlogging.
Pro tip: When adding organic amendments, mix them thoroughly into the existing soil rather than creating distinct layers. This ensures even nutrient distribution and helps create a consistent growing environment for your perennial plants.
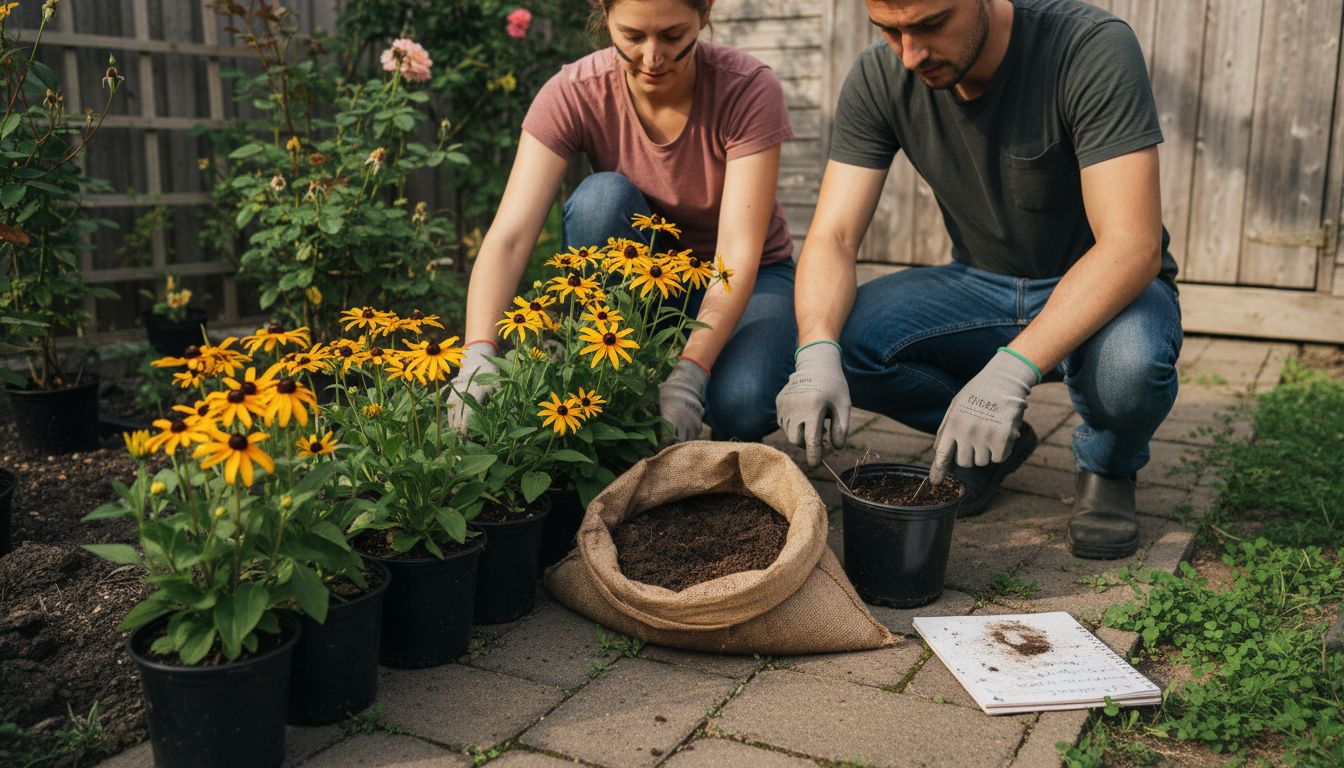
Step 5: Plant and arrange your perennials
Planting and arranging perennials is an art form that transforms your carefully prepared garden space into a living, breathing landscape. This step requires patience, precision, and a thoughtful approach to creating a harmonious plant community.
Begin by carefully removing each perennial from its container, gently loosening the root ball to encourage outward root growth. Garden design principles suggest maintaining consistent spacing between plants to allow proper air circulation and room for future growth. Dig holes slightly wider than the root ball and at a depth that allows the plant to sit at the same level it was growing in its original container. Position taller plants toward the back of garden beds and shorter varieties in front, creating a natural layered appearance that provides visual depth and interest.
Pay close attention to each plant’s specific planting requirements. Some perennials prefer being planted slightly higher than ground level to prevent crown rot, while others need precise soil coverage. Water thoroughly immediately after planting to help settle the soil and eliminate air pockets around the roots. Group plants with similar water and sunlight needs together to simplify maintenance and create microclimates that support optimal growth.
Pro tip: After planting, add a 2 to 3 inch layer of organic mulch around your perennials. This helps retain moisture, regulate soil temperature, and suppress weed growth while giving your garden a polished, professional appearance.
Step 6: Maintain and monitor garden health
Maintaining a thriving perennial garden requires consistent attention and proactive care. Your goal is to create an environment where plants can flourish and develop robust health throughout the growing season.
Establish a regular monitoring routine that includes weekly garden inspections. Look for signs of stress, pest activity, or disease, addressing potential issues before they become serious problems. Seasonal garden maintenance involves careful observation of plant vigor, checking for discoloration, wilting, or unusual growth patterns. Water deeply and consistently, ensuring plants receive adequate moisture without becoming waterlogged. During dry spells, focus on providing steady hydration that reaches plant root systems.
Implement strategic pest management by encouraging beneficial insects and using organic control methods. Remove dead or damaged plant material promptly to prevent disease spread and maintain garden aesthetics. Prune perennials at appropriate times seasonal pruning helps stimulate healthy growth and prevents overcrowding. Mulch around plants to retain moisture, regulate soil temperature, and suppress weed growth. Monitor soil moisture levels and adjust watering schedules based on weather conditions and individual plant requirements.
Pro tip: Keep a garden journal to track plant performance, flowering periods, and any maintenance activities. This documentation helps you understand your garden’s unique ecosystem and make informed decisions in future seasons.

Elevate Your Perennial Garden Planning with Expert Guidance
Struggling to design a thriving perennial garden that balances plant selection, soil health, and seasonal beauty is a common challenge for gardeners at all levels. This article highlights the importance of assessing your garden space, choosing appropriate plant varieties, and creating a well-thought-out layout to achieve lasting success. Key concepts like layering plants for visual depth, soil preparation with organic amendments, and staggered blooming periods can feel overwhelming without practical advice tailored to your unique garden environment.
At Lushy Gardens, we understand these challenges and offer a wealth of expert insights to support your gardening journey. Explore our Design Ideas section for inspiration on arranging perennials creatively and strategically. Discover tailored tips in our Seasonal Gardening category that help you maintain garden health year-round while maximizing blooms and vitality. Start transforming your outdoor space today with trusted advice and step-by-step guides designed to simplify perennial gardening.
Take the next step toward a flourishing perennial landscape that reflects your passion and care. Visit Lushy Gardens now and access personalized solutions that make your garden dreams a reality.
Frequently Asked Questions
How do I assess my garden space and soil for perennial planting?
Begin by observing your garden for sunlight exposure, soil type, and drainage patterns. Perform a simple hand test on the soil to determine its texture and incorporate soil testing to analyze pH and nutrient levels before selecting plants.
What are the best perennial plant varieties for my garden?
Choose perennial plants that match your garden’s specific conditions, such as climate, sunlight, and soil type. Research native species in your area, as they often thrive with less maintenance and better adapt to local environments.
How should I design the layout of my perennial garden?
Create a rough sketch of your garden space, considering the mature size of each plant. Position taller plants at the back and shorter ones in the front to enhance visibility and ensure that all plants receive adequate sunlight and air circulation.
What steps should I take to prepare my planting beds?
Start by removing weeds and debris, then loosen the soil to a depth of 12 to 15 inches. Amend the soil with organic matter like compost to improve its nutrient content and drainage, creating a healthier environment for your perennials.
How can I maintain the health of my perennial garden?
Establish a regular monitoring routine to check for signs of stress, pests, and diseases. Water deeply and consistently, pruning as needed, and keeping a garden journal to track plant performance will help maintain garden health.
What should I do immediately after planting my perennials?
Water thoroughly right after planting to eliminate air pockets and help the soil settle around the roots. Apply a 2- to 3-inch layer of organic mulch around your plants to retain moisture and suppress weeds, enhancing the appearance and health of your garden.
Recommended
- Perennial vs Annual Plants: Everything You Need to Know – Lushy Gardens
- Simple Garden Design Ideas for Beginners – Lushy Gardens
- Understanding Garden Design for Beginners: Key Concepts – Lushy Gardens
- Seasonal Garden Maintenance: Step-by-Step Success Guide – Lushy Gardens
- 7 Best Plants for Kitchens to Brighten Your Space

I’m Eleanor, a seasoned gardener with over three decades of experience tending to Mother Nature’s creations. Through Lushy Gardens, I aim to share my wealth of knowledge and help fellow plant enthusiasts uncover the wonders of gardening. Let’s dive into this journey together, one leaf at a time.


