
Table of Contents
TL;DR:
- Plant propagation is simple, affordable, and can be done with common household tools.
- Different methods suit various plants and skill levels, with stem cuttings being the easiest for beginners.
- Proper tools, cleanliness, and patience are key to successful rooting and thriving new plants.
Multiplying your favorite houseplant for free sounds like something only expert gardeners do, but it’s actually one of the most accessible skills any home gardener can learn. You don’t need a greenhouse, expensive equipment, or years of experience. A healthy stem, a glass of water, and a little patience are often all it takes. Whether you want more pothos trailing across your shelves or a fresh batch of snake plants to share with friends, this guide walks you through every method, tool, and troubleshooting tip you need to build a thriving indoor collection from the plants you already own.
Table of Contents
- Overview of DIY plant propagation: What and why
- Tools and materials: What you need to get started
- Step-by-step propagation methods for success
- Troubleshooting and tips for thriving new plants
- A gardener’s perspective: What really works (and what’s overrated)
- Expand your skills with more Lushy Gardens guides
- Frequently asked questions
Key Takeaways
| Point | Details |
|---|---|
| Propagation made simple | With basic tools and steps, anyone can multiply their favorite houseplants at home. |
| Choose the right method | Stem cuttings, leaf cuttings, division, and layering each suit different plant types and skill levels. |
| Preparation is essential | Clean tools and healthy mother plants greatly increase propagation success. |
| Troubleshoot early | Spotting rot or poor rooting quickly helps you save cuttings and improve results. |
| Growth takes time | Roots may take a few weeks to develop; patience and consistent care are key. |
Overview of DIY plant propagation: What and why
Before diving into specific steps, it’s important to understand what propagation is and why it’s a game-changer for indoor gardening.
Propagation simply means creating new plants from an existing one. Instead of buying a new plant every time you want to expand your collection, you use a piece of a healthy parent plant to grow a genetically identical offspring. It’s free, satisfying, and surprisingly fast once you get the hang of it.

There are several plant propagation techniques that work well for home gardeners, each suited to different plant types and skill levels. The propagation methods overview includes stem cuttings in water or soil, leaf cuttings, division, layering, and offsets or pups, and each has its own strengths depending on what you’re growing.
Here’s a quick comparison to help you choose the right approach:
| Method | Best plant types | Skill level | Time to root |
|---|---|---|---|
| Stem cuttings (water) | Pothos, philodendron, coleus | Beginner | 2 to 4 weeks |
| Stem cuttings (soil) | Most houseplants | Beginner | 3 to 6 weeks |
| Leaf cuttings | Succulents, snake plant, begonia | Beginner | 4 to 8 weeks |
| Division | Spider plant, peace lily | Beginner | Immediate |
| Layering | Ficus, pothos, rubber plant | Intermediate | 4 to 12 weeks |
| Offsets/pups | Aloe, bromeliad, spider plant | Beginner | 2 to 4 weeks |
According to the Virginia Tech propagation guide, matching the right method to the right plant dramatically improves your success rate. The main propagation methods for home gardeners include stem cuttings, leaf cuttings, division, layering, and offsets, giving you plenty of options no matter what’s growing on your windowsill.
The best starter plants for new propagators include:
- Pothos: Roots in water within two weeks, nearly impossible to fail
- Spider plant: Produces ready-to-root pups on long runners
- Snake plant: Leaf cuttings root reliably in soil or water
- Aloe vera: Offsets separate cleanly from the mother plant
- Jade plant: Stem or leaf cuttings callus and root with minimal fuss
Spring and early summer are the ideal times to propagate. Plants are actively growing, hormone levels are naturally high, and warmer temperatures speed up rooting. That said, many tropical houseplants will root year-round if kept in a warm, bright spot indoors.
The real appeal of home propagation is the cost savings and the personal connection to your plants. Growing a new pothos from a cutting you took yourself feels completely different from buying one at a garden center.
Tools and materials: What you need to get started
Now that you’re familiar with the main methods, let’s make sure you have all the tools and materials needed to start propagating at home.
You genuinely don’t need much. Most successful propagations happen with items already in your kitchen or garage. Here’s what matters most:
- Clean scissors or pruning shears: The single most important tool. Dirty blades spread disease between plants.
- Small containers or jars: Glass jars work perfectly for water propagation; small nursery pots for soil.
- Potting mix or perlite: A well-draining mix prevents rot and encourages healthy roots.
- Labels and a marker: You’ll forget what you planted within a week. Label everything.
- Rooting hormone (optional): A powder or gel that encourages faster root development.
- Humidity dome or plastic bag: Traps moisture around cuttings and speeds up rooting.
| Tool | Purpose | Pro tip |
|---|---|---|
| Sharp scissors | Clean cuts reduce stress and disease | Wipe with rubbing alcohol between plants |
| Glass jar | Water propagation vessel | Clear glass lets you monitor root growth |
| Perlite mix | Drainage and aeration | Mix 50/50 with potting soil for cuttings |
| Rooting hormone | Stimulates faster root growth | Use gel form for easier application |
| Humidity dome | Maintains moisture around cutting | A clear plastic bag over a pot works just as well |
Cleanliness is not optional. Sanitized tools and healthy cuttings taken in the morning, when plants are most hydrated, give you the best foundation. That same research shows rooting hormone can boost success rates by 20 to 30 percent for harder-to-root species.
For most beginner plants like pothos or spider plant, you can skip the rooting hormone entirely. But if you’re working with woody stems or plants like gardenia or bougainvillea, hormone is worth using.
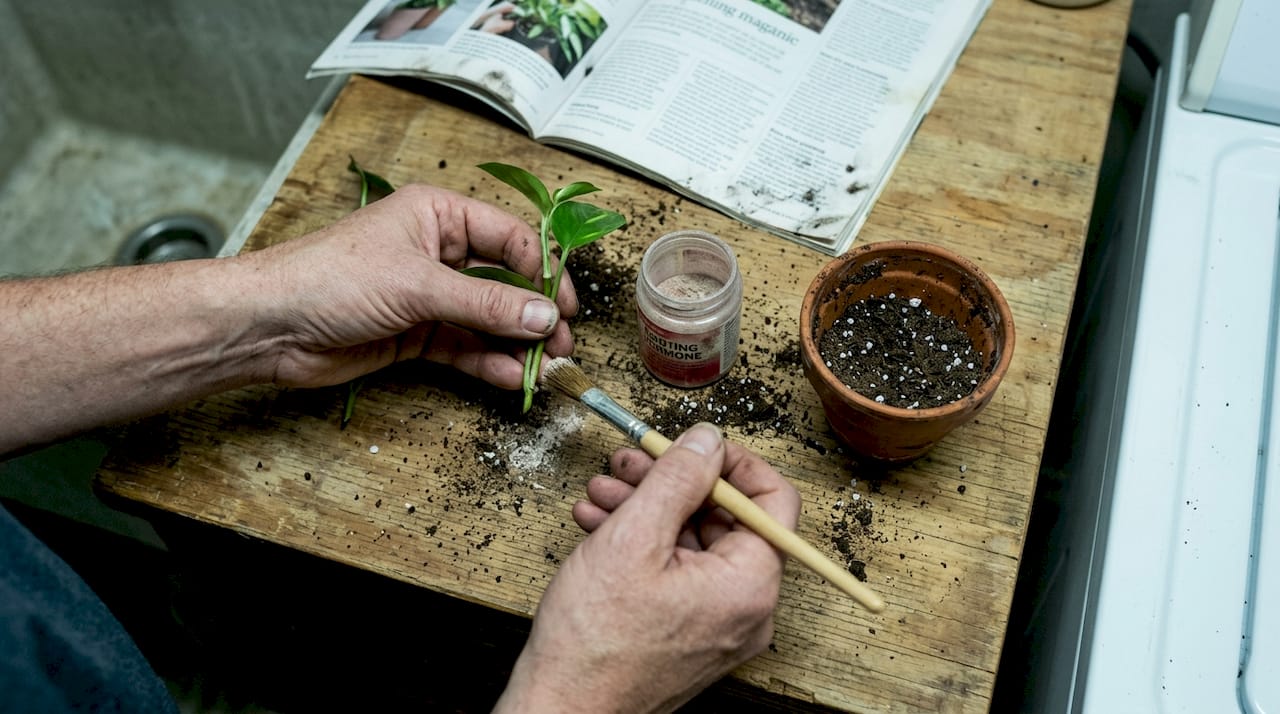
Pro Tip: Take cuttings in the morning before the heat of the day. Plants are fully hydrated at this time, which means your cutting starts with maximum stored energy and moisture, giving it a stronger chance of surviving the transition.
Grow lights are optional but helpful in winter when natural light drops. A basic LED grow light placed 6 to 12 inches above your cuttings can make a real difference in rooting speed during darker months. Check out our growing from cuttings guide for more detail on setting up your propagation station at home.
Step-by-step propagation methods for success
With supplies ready, let’s walk through each propagation method so you can achieve reliable roots and new shoots.
Stem cuttings in water:
- Choose a healthy stem with at least two or three leaves and one visible node (the bump where leaves attach).
- Cut 4 to 6 inches below the node using clean scissors.
- Remove all leaves from the bottom half of the cutting so no foliage sits in the water.
- Place the cutting in a jar of room-temperature water, keeping the node submerged.
- Set in bright, indirect light and change water every 3 to 5 days to prevent bacterial buildup.
- Transplant to soil once roots reach 1 to 2 inches long.
Stem cuttings in soil:
- Prepare a small pot with moist perlite or well-draining potting mix.
- Take the same type of cutting described above and dip the cut end in rooting hormone if using.
- Poke a hole in the soil with a pencil and insert the cutting so the node is buried.
- Firm the soil around the stem and cover with a humidity dome.
- Keep moist but not soggy. Roots typically form in 3 to 6 weeks.
Leaf cuttings (for succulents and snake plants):
- Twist or cut a healthy leaf cleanly from the base.
- Let it dry for 24 to 48 hours so the cut end calluses over.
- Lay flat on moist soil or prop the cut end slightly into the mix.
- Mist lightly every few days. Tiny plantlets emerge from the base in 4 to 8 weeks.
Division:
- Remove the parent plant from its pot.
- Gently pull or cut the root ball into two or more sections, each with healthy roots and foliage.
- Pot each section separately and water well.
Air layering is ideal for woody stems or plants that are difficult to root from cuttings. According to Penn State Extension, layering achieves 80 to 95% success and air layering on woody stems takes 4 to 12 weeks to produce usable roots. For step-by-step guidance on specific plants, see our guides on jade plant propagation, snake plant propagation, and ZZ plant propagation.
Pro Tip: Cover water-propagated cuttings loosely with a clear plastic bag to raise humidity. This small step can cut rooting time nearly in half for tropical plants like pothos and philodendron.
Troubleshooting and tips for thriving new plants
Even experienced gardeners run into hiccups. This section equips you to solve problems and optimize for thriving baby plants.
The most common failure is rot. Mushy stems, brown slime in the water, or a foul smell all point to bacterial or fungal problems. Here’s how to diagnose and fix the most frequent issues:
- Mushy stem base: Usually overwatering or dirty tools. Trim the rotted section, re-sanitize, and start fresh.
- No roots after 6 weeks: Check light levels and temperature. Cuttings need warmth above 65°F and bright indirect light.
- Yellowing leaves on cutting: Normal for lower leaves, but widespread yellowing means the cutting is stressed. Reduce direct sun and check moisture.
- Fungus gnats or mold on soil: Soil is too wet. Allow the top layer to dry slightly between waterings and improve airflow.
- Roots form in water but die after transplanting: This is a real issue. Water propagation produces weak roots that struggle to adapt to soil, while perlite or soil propagation tends to produce stronger, transplant-ready roots from the start.
For succulent plant tips and beginner houseplant advice, the same principle applies: less water, more airflow, and clean tools win every time.
One advanced trick worth knowing: blue LED light at around 450 nanometers has been shown to accelerate root initiation in certain cuttings. It’s not essential, but if you’re already using a grow light, look for one with a blue spectrum setting.
Critical note: Always sanitize your cutting tools with rubbing alcohol or a 10% bleach solution before and between cuts. One infected blade can spread disease to every cutting you take that day, wiping out an entire propagation batch before it even starts.
The university extension guidance consistently emphasizes proper moisture management and clean technique as the two factors most within your control. Get those right and most other problems take care of themselves.

A gardener’s perspective: What really works (and what’s overrated)
Water propagation is everywhere on social media right now, and yes, it looks beautiful. A row of glass jars with trailing roots catching the light is genuinely satisfying. But here’s the honest truth: water propagation is often the weakest method for long-term plant health.
Roots that develop in water are structurally different from soil-grown roots. They’re adapted to a low-oxygen, high-moisture environment, which means transplanting them into soil causes real stress and sometimes failure. Soil or perlite propagation produces roots that are ready to work from day one in their permanent home.
The best advice for anyone starting out is to ignore the gadgets and focus on the basics. A proven propagation guide and a few healthy cuttings will outperform any expensive propagation station. Start with pothos or spider plant, get comfortable with the process, and build from there. University extension offices publish some of the most reliable, research-backed propagation information available, and it’s all free. That’s where we’d point any new gardener before trusting a trending social media hack.
Expand your skills with more Lushy Gardens guides
Feel ready to try propagation? Discovering even more tools for your gardening journey is just a click away. At Lushy Gardens, we’ve built a full library of practical, tested guides designed for gardeners at every level. Whether you’re ready to follow a detailed propagating houseplants complete guide or want to strengthen your foundation with essential indoor plant care tips, we’ve got you covered. New to gardening altogether? Our gardening basics guide is the perfect starting point. Every resource is written with real gardeners in mind, focused on what actually works at home rather than what looks good in theory.
Frequently asked questions
What is the easiest DIY propagation method for beginners?
Stem cuttings in water are the simplest starting point for most houseplants. Just snip below a node, place in water, and roots form in weeks without any special equipment.
How long does plant propagation take?
Most cuttings root in 2 to 4 weeks under good conditions. Woody plants or air layering can take 4 to 12 weeks depending on the species and environment.
Do I need special soil or rooting hormone?
Most easy houseplants root in regular potting mix without any hormone. Rooting hormone boosts success by 20 to 30% for woody or difficult-to-root species where it genuinely earns its place.
Why are my cuttings rotting instead of rooting?
Rot usually comes from dirty tools, overwatering, or poor airflow. Use sanitized tools and proper moisture levels, and trim any mushy sections before trying again with a fresh cutting.
Recommended
- Master Plant Propagation Techniques for Thriving Gardens – Lushy Gardens
- Mastering Propagating Houseplants: A Complete Guide – Lushy Gardens
- Growing Plants from Cuttings: Easy Step-by-Step Success – Lushy Gardens
- Master Plant Propagation Methods for Thriving Gardens – Lushy Gardens

I’m Eleanor, a seasoned gardener with over three decades of experience tending to Mother Nature’s creations. Through Lushy Gardens, I aim to share my wealth of knowledge and help fellow plant enthusiasts uncover the wonders of gardening. Let’s dive into this journey together, one leaf at a time.


