
Table of Contents
TL;DR:
- Stem cuttings are an effective method of asexual plant propagation that produces plants genetically identical to the parent. Success depends on matching the correct cutting type with appropriate environmental conditions, such as humidity and temperature, and ensuring proper preparation. Softwood cuttings root fastest, within weeks, while hardwood cuttings take months; using rooting hormone can improve success rates.
Propagation by stem cuttings is defined as an asexual method of creating new plants by rooting a section of a parent plant’s stem, producing offspring that are genetically identical to the parent. The formal horticultural term is vegetative propagation, and stem cuttings are one of its most reliable forms. You do not need a greenhouse or expensive equipment to succeed. Clean clippers, rooting hormone, a humidity dome, and the right technique are enough to multiply nearly any plant in your collection. This guide covers every stage of the process, from selecting your cutting to transplanting a rooted plant.
What is propagation by stem cuttings and how does it work?
Stem cutting propagation works because plant stems contain meristematic tissue at their nodes. These are the points where leaves attach to the stem. Meristematic cells at nodes hold the genetic instructions to differentiate into both roots and new shoots, which is why cutting placement matters so much. Bury the node in rooting medium and roots will form there. Leave it above the soil and nothing happens.
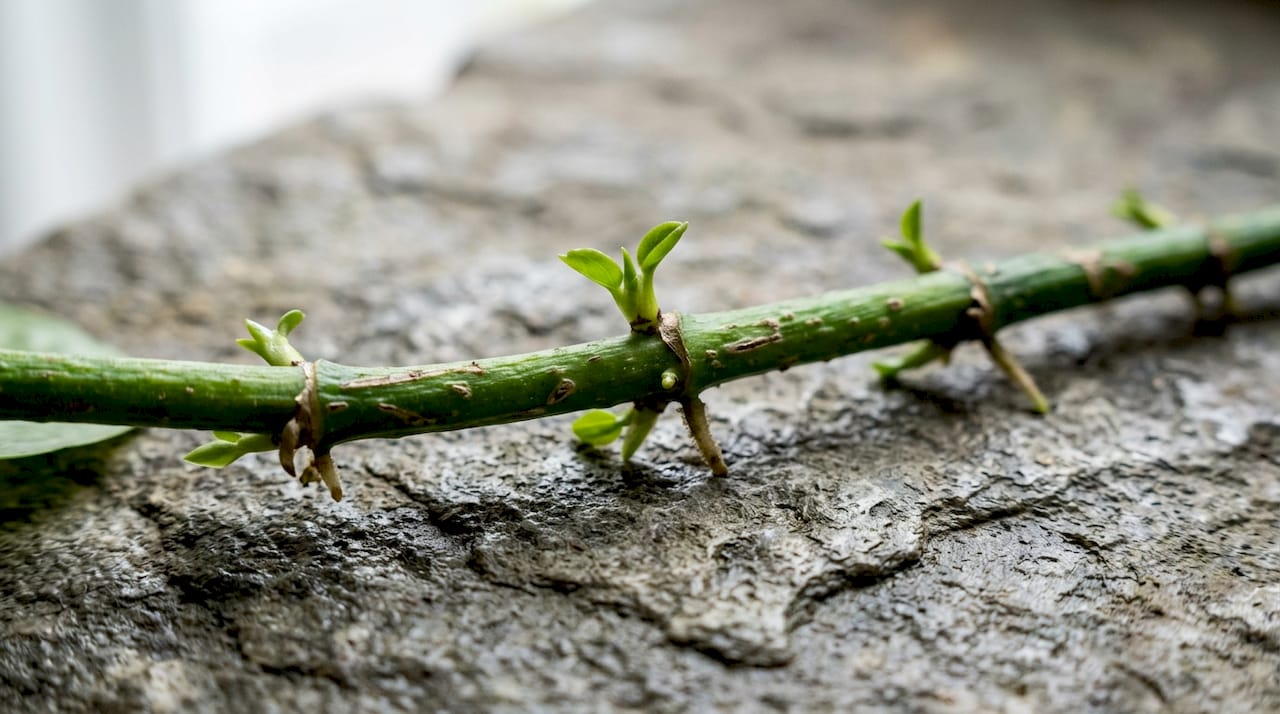
The process is straightforward. You take a healthy stem section from a parent plant, remove the lower leaves, and place the cut end into a moist rooting medium. Roots emerge from the buried node region within days to weeks, depending on the plant species and cutting type. The new plant carries the exact genetics of the parent, which makes this method ideal when you want to preserve a specific variety, color, or growth habit.
What are the different types of stem cuttings?
Different wood stages affect rooting physiology, timing, and the conditions each cutting type needs. Using one approach for all cutting types is the most common reason propagation fails.
| Cutting type | Wood stage | Rooting time | Example plants |
|---|---|---|---|
| Softwood | New, flexible growth | 2–5 weeks | Basil, coleus, impatiens |
| Semi-hardwood | Partially matured | 4–6 weeks | Camellia, azalea, holly |
| Hardwood | Fully dormant, woody | Several months | Rose, dogwood, willow |
Softwood cuttings come from the newest, most flexible growth at the tip of a stem. They root fastest because the tissue is still actively dividing. The RHS notes that softwood cuttings root in about 2–4 weeks under the right conditions, specifically bottom heat of 64–75°F and high humidity. Take softwood cuttings in late spring through early summer when new growth is actively pushing.

Semi-hardwood cuttings come from stems that have partially matured but are not yet fully woody. Camellias, azaleas, and hollies respond well to this stage. Timing falls in mid to late summer. These cuttings need slightly less humidity than softwood but still benefit from a humidity enclosure.
Hardwood cuttings are taken from fully dormant, woody stems in late fall or winter. They root slowly but require minimal care during the process. Roses, dogwoods, and willows are classic candidates. You can bundle hardwood cuttings and store them in slightly moist sand until spring planting.
How to prepare and take stem cuttings for propagation
Preparation is where most gardeners either set themselves up for success or quietly guarantee failure. Follow these steps in order.
- Water the parent plant the day before. A fully hydrated stem loses moisture more slowly after cutting. Collecting softwood material early in the day when shoots are turgid gives you the best starting condition.
- Sterilize your cutting tool. Dip sharp clippers or a clean knife in rubbing alcohol before each cut. A contaminated blade introduces pathogens directly into the wound.
- Select a healthy stem section. Choose stems with no signs of disease, pest damage, or stress. Avoid flowering stems when possible since the plant’s energy is directed toward blooms rather than root production.
- Cut to 3–6 inches in length. The cutting must include at least two nodes to give roots a place to form and shoots a place to emerge. Cut cleanly just below the lowest node.
- Remove lower leaves. Strip any leaves that would sit below the soil line. Buried leaves rot and introduce fungal problems.
- Apply rooting hormone. Dip the cut end into powdered or gel rooting hormone such as Bonide Bontone II or Clonex. Tap off any excess powder. Rooting hormone contains auxins that accelerate root initiation, especially in semi-hardwood and hardwood cuttings.
- Insert the cutting immediately. Place the cutting into pre-moistened rooting medium right away. Delays allow the cut end to dry and seal over, which slows rooting.
Pro Tip: Never let a fresh cutting sit on a bench exposed to air. Wrap it in a damp paper towel if you cannot pot it within a few minutes. Cuttings lose water fast before roots form.
What are the ideal rooting conditions for stem cuttings?
The environment around your cutting determines whether roots form or the cutting simply dies. Cuttings transpire water until roots form, so every condition you control is aimed at slowing that water loss while keeping the stem alive.
The right rooting medium balances moisture retention with air circulation. A mix of equal parts vermiculite, potting soil, and horticultural sand works well for most species. Pure vermiculite or perlite works for softwood cuttings that root quickly. Avoid standard potting mixes with heavy fertilizer content since high nitrogen levels can burn unrooted stems.
Key environmental conditions to maintain:
- Humidity: Cover cuttings with a clear plastic bag, a propagator lid, or a humidity dome. Lift the cover briefly each day to allow air exchange and prevent fungal buildup.
- Temperature: Keep the rooting area at 65–75°F. Bottom heat from a seedling heat mat accelerates root formation, particularly for softwood cuttings.
- Light: Place cuttings in bright, indirect light. Direct sun raises leaf temperature and increases water loss before roots can compensate.
- Moisture: Keep the medium consistently moist but never waterlogged. Soggy medium causes stem rot at the cut end.
Pro Tip: A clear plastic bag secured over a small pot with a rubber band creates a cheap, effective humidity chamber. Poke two or three small holes in the bag for air exchange so condensation does not become a fungal problem.
The rooting medium should stay moist under plastic with indirect light throughout the rooting period. Check moisture every two to three days and mist lightly if the medium surface feels dry.
How can you tell when roots have formed?
Knowing when to act after placing a cutting is as important as the cutting itself. Acting too early by potting up before roots are established kills the plant. Waiting too long in a small propagation cell can starve it.
- Perform the tug test. Gently grip the stem near the base and apply light upward pressure. Resistance to a gentle tug signals that roots have anchored into the medium. No resistance means roots have not formed yet.
- Watch for new leaf growth. A cutting pushing out new leaves is drawing nutrients and water through a functioning root system. This is the clearest visual signal of success.
- Check rooting timelines. Softwood cuttings typically root in 2–5 weeks. Semi-hardwood cuttings take 4–6 weeks. Hardwood cuttings may take several months.
- Pot up into fresh soil. Once rooted, move the cutting into a small pot with standard potting mix. Do not jump to a large container since excess soil holds moisture the small root system cannot use.
- Harden off before outdoor planting. The RHS recommends hardening off softwood cuttings for two weeks before potting on or moving outdoors. Remove the humidity cover gradually over several days rather than all at once.
The most common post-rooting mistake is removing the humidity enclosure too quickly. The cutting’s root system is still small and cannot replace water as fast as the leaves lose it. Reduce humidity slowly over five to seven days.
Which plants are best suited for stem cutting propagation?
Not every plant roots from a stem cutting, but a wide range of popular houseplants and garden plants do. Plants well-suited for stem cuttings share a few traits: clearly defined nodes, actively growing stems, and the ability to produce adventitious roots from stem tissue.
Strong candidates for home propagators include:
- Philodendron: Roots readily in water or soil from a single node cutting. One of the easiest plants to start with.
- Pothos: Similar to philodendron, roots in water within one to two weeks.
- Dracaena: Propagates from cane sections as well as tip cuttings.
- English ivy: Softwood cuttings root quickly in moist medium under humidity.
- Dumb cane (Dieffenbachia): Stem sections with at least one node root reliably.
- Weeping fig (Ficus benjamina): Semi-hardwood cuttings taken in summer root with patience and consistent humidity.
Plants that do not propagate well from stem cuttings include most palms, ferns, and orchids. These species rely on division, spores, or specialized tissue culture methods instead. If you want to learn about propagation methods beyond stem cuttings, Lushygardens covers the full range of vegetative techniques.
Key takeaways
Stem cutting propagation succeeds when you match the cutting type to the right conditions, keep humidity high before roots form, and give the plant time to establish before removing its protective environment.
| Point | Details |
|---|---|
| Cut just below a node | Nodes contain the meristematic tissue that generates roots and new shoots. |
| Match cutting type to season | Softwood in spring, semi-hardwood in summer, hardwood in late fall or winter. |
| Control humidity throughout | Use a dome or plastic cover until roots are confirmed by the tug test. |
| Use clean, sharp tools | Sterilized clippers prevent pathogen transfer directly into the cut stem. |
| Harden off gradually | Remove humidity enclosures over five to seven days to avoid transplant shock. |

What I have learned from years of propagating stem cuttings
The single biggest mistake I see from gardeners who are new to propagation is impatience with hydration. They take a cutting, let it sit on the potting bench for twenty minutes while they prepare the medium, and then wonder why it wilts and dies within a week. A stem cutting has no roots. It cannot replace the water it loses through its leaves. Every minute it sits exposed, it is losing ground.
The second thing I have learned is that node placement is not optional. I have watched gardeners insert cuttings with the node sitting above the soil line because they did not want to bury the stem too deep. Nothing roots. The meristematic tissue has to be in contact with moist medium to initiate root growth. Cut just below the node and bury it. That is the whole secret.
For beginners, I always recommend starting with pothos or philodendron. Both root in plain water, which lets you watch root development in real time. That visual feedback teaches you more about the process than any written guide. Once you understand what healthy root initiation looks like, you can move on to more demanding species like camellias or ficus with confidence. You can also grow plants from cuttings using natural methods that skip synthetic rooting hormones entirely if that fits your approach.
Propagation is a skill that compounds. Your first batch of cuttings will have mixed results. Your tenth batch will be nearly all successes. Keep notes on what worked, what season you took the cuttings, and how long rooting took. That record becomes more useful than any general guide.
More propagation resources from Lushygardens
Lushygardens has built a library of guides for gardeners who want to go deeper on propagation and plant care. The houseplant propagation guide walks through stem cutting techniques for the most popular indoor species, with tool recommendations and troubleshooting tips for common failures. If you are just getting started with gardening more broadly, the gardening basics for beginners guide covers foundational skills that make propagation easier to understand and execute. Lushygardens also publishes seasonal plant care content to help you time your cuttings correctly throughout the year.
FAQ
What is the difference between softwood and hardwood cuttings?
Softwood cuttings come from new, flexible growth and root in 2–5 weeks. Hardwood cuttings come from fully dormant, woody stems and take several months to root.
Do stem cuttings need rooting hormone?
Rooting hormone is not required for fast-rooting species like pothos or philodendron, but it significantly improves success rates for semi-hardwood and hardwood cuttings by accelerating root initiation.
How long does it take for stem cuttings to root?
Softwood cuttings typically root in 2–5 weeks, semi-hardwood cuttings in 4–6 weeks, and hardwood cuttings can take several months depending on species and conditions.
Can you propagate with stem cuttings in water?
Yes. Many houseplants including pothos, philodendron, and English ivy root readily in a glass of water. Transfer water-rooted cuttings to soil once roots reach about one inch in length.
Why do my stem cuttings keep dying before rooting?
The most common cause is drying out before roots form. Keep cuttings under a humidity dome, remove lower leaves, and never let fresh cuttings sit exposed to open air for more than a few minutes.
Recommended
- Growing Plants from Cuttings: Easy Step-by-Step Success – Lushy Gardens
- Mastering Propagating Houseplants: A Complete Guide – Lushy Gardens
- Master Plant Propagation Methods for Thriving Gardens – Lushy Gardens
- Master Plant Propagation Techniques for Thriving Gardens – Lushy Gardens

I’m Eleanor, a seasoned gardener with over three decades of experience tending to Mother Nature’s creations. Through Lushy Gardens, I aim to share my wealth of knowledge and help fellow plant enthusiasts uncover the wonders of gardening. Let’s dive into this journey together, one leaf at a time.


