
Table of Contents
TL;DR:
- Soilless gardening enables plant growth without soil by relying on water-based nutrient solutions and inert media. It offers significant water savings, faster growth, and year-round indoor cultivation, especially useful in limited spaces or dry climates. Beginners should start with easy-to-grow plants like lettuce and herbs using simple setups such as the Kratky method to gain confidence and understanding.
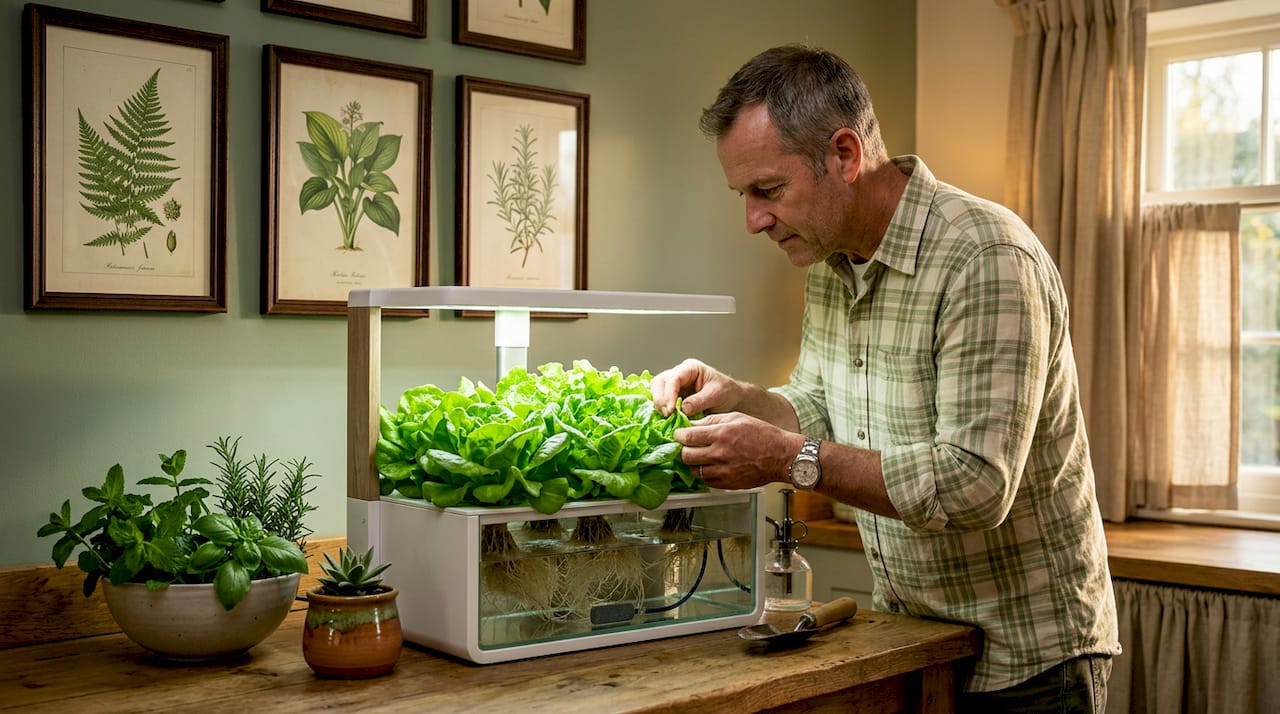
You don’t need a backyard, a bag of potting mix, or even a trowel to grow your own food. Soilless gardening is exactly what it sounds like: growing plants without soil, using water-based nutrient systems or inert physical media instead. It sounds radical until you realize that plants don’t actually need soil itself. They need what soil contains, which is nutrients, water, oxygen, and physical support. Once you understand that distinction, a whole new world of growing methods opens up, whether you’re working with a sunny windowsill or a spare room in your home.
Table of Contents
- Key takeaways
- What soilless gardening actually is
- Advantages and disadvantages of soilless growing
- Popular soilless methods compared
- Best plants for soilless systems
- How to start your first soilless setup
- My take on soilless gardening after years of growing
- Start growing with Lushygardens
- FAQ
Key takeaways
| Point | Details |
|---|---|
| Soil isn’t mandatory | Plants need nutrients and water, not soil itself, making soilless systems fully viable for home growing. |
| Water savings are significant | Soilless systems use up to 95% less water than traditional farming by recirculating nutrients. |
| Method complexity varies | Passive systems like the Kratky method suit beginners; aeroponics and NFT demand more experience. |
| Plant selection matters | Leafy greens and herbs thrive soillessly; root vegetables like carrots are harder to manage. |
| Monitoring is non-negotiable | pH and nutrient levels require regular checking to prevent rapid imbalances that harm plants. |
What soilless gardening actually is
Soilless gardening refers to any method of growing plants where the root zone is supported by water, nutrient solutions, or an inert physical medium rather than natural soil. The term covers a wide family of techniques, with hydroponics being the most widely recognized.
Hydroponic gardening explained simply: plant roots receive a precisely formulated solution of water and dissolved minerals. There is no physiological difference between plants grown this way and plants grown in soil. The roots don’t care where the nutrients come from. What matters is that the right minerals arrive at the right concentrations, at the right time.
Beyond pure water culture, soilless systems often use physical substrates to anchor plants and regulate moisture. Common ones include:
- Coconut coir: A fibrous material from coconut husks that holds moisture well and resists compaction
- Perlite: Lightweight volcanic glass that improves drainage and air circulation around roots
- Rockwool: Spun basalt fiber used widely in commercial greenhouse production for excellent water retention
- Clay pebbles (hydroton): Reusable round pellets that drain freely and support root development
- Vermiculite: Mineral-based granules that retain both moisture and nutrients longer than perlite
These substrates provide support only. They don’t feed your plants. All nutrition comes from the liquid solution you supply.
The most common soilless methods you’ll encounter are nutrient film technique (NFT), deep-water culture (DWC), aeroponics, the Kratky passive method, and wick systems. Aquaponics is a related system that adds fish to the equation, with fish waste providing nutrients for plants. Each approach has its own setup logic, cost profile, and learning curve.
Advantages and disadvantages of soilless growing
The case for going soilless is genuinely compelling, especially if you garden in a small space, live in a dry climate, or have dealt with recurring soil-borne pests. But it’s not without trade-offs.
Why soilless growing makes sense
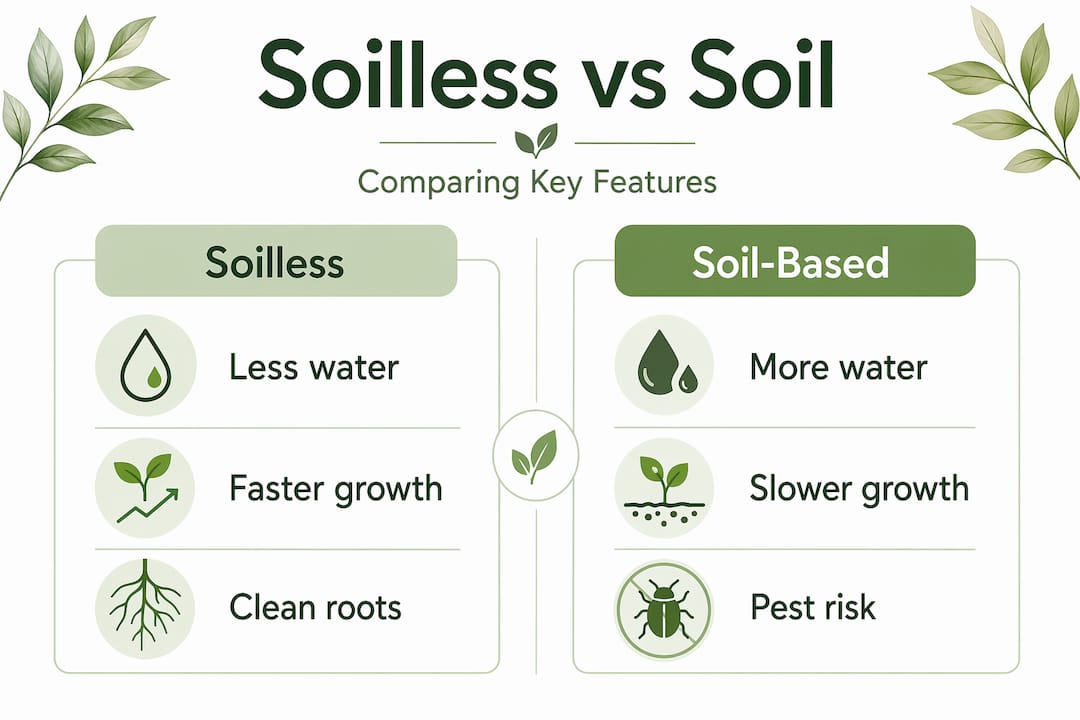
The water efficiency argument alone is hard to dismiss. Soilless systems use 85 to 95% less water than traditional soil farming because they recirculate the nutrient solution rather than letting it drain away. For anyone gardening in an area with water restrictions, or simply trying to lower their footprint, this is a major practical win.
Growth speed is another real advantage. Because nutrients go directly to the root zone without any need to be unlocked from organic matter, plants access what they need faster. Yields can increase up to 250% in controlled soilless systems compared to conventional growing. That’s not marketing language. That’s what happens when you remove environmental variables and optimize the root zone.
Year-round indoor growing with reduced pest and disease exposure is another major benefit. Soil is a carrier for fungus gnats, root rot pathogens, and nematodes. Eliminate soil and you eliminate a large category of problems before they start.
Where soilless systems fall short
Soilless growing demands consistent attention. Neglect leads to rapid nutrient imbalances that can kill plants within days, not weeks. In soil, the medium buffers mistakes. In a hydroponic reservoir, there’s no such buffer.
Startup costs can be a barrier. A basic DIY setup can be built for around $50 using common materials, but more capable systems with timers, pumps, and grow lights run considerably higher. Electricity use for indoor systems is a real ongoing cost to factor in.
Pro Tip: Before buying equipment, grow one fast-cycling crop like lettuce in a simple Kratky setup first. It costs almost nothing, and it will teach you more about nutrient management than any video course.
Popular soilless methods compared
Understanding your options before you build anything saves time and money. Here’s how the main soilless gardening techniques compare:
| Method | Complexity | Startup cost | Best for |
|---|---|---|---|
| Kratky (passive) | Very low | Under $20 | Beginners, leafy greens |
| Wick system | Low | $20-$40 | Herbs, small plants |
| Deep-water culture (DWC) | Low-medium | $40-$80 | Lettuce, herbs, tomatoes |
| Nutrient film technique (NFT) | Medium | $100+ | Commercial-style setups |
| Aeroponics | High | $200+ | Advanced growers only |
| Substrate culture | Low-medium | $30-$60 | Tomatoes, peppers, cucumbers |
The Kratky method deserves special mention for beginners. Plants sit in net pots above a static reservoir of nutrient solution. As roots grow down and consume the liquid, an air gap forms naturally. No pump needed, no electricity required for the water system. It’s genuinely one of the most forgiving entry points into soilless growing.
NFT systems work by flowing a thin film of nutrient solution along the bottom of angled channels, with plant roots suspended above. The pipe gradient must be balanced carefully to deliver both nutrients and oxygen to roots. Get the angle wrong and you’ll see root stress or rot within a week.
Aeroponics is efficient but high-tech and failure-prone. Roots hang in air and are misted with nutrient solution on a timer. If the pump fails for even a few hours, roots dry out and plants die. That risk profile makes it poorly suited to anyone just getting started.
Substrate culture, using coconut coir or a mix of perlite and coir in pots or grow bags, is often overlooked but practical. You irrigate manually or with a drip system, and the plants behave much like they would in soil, just faster and cleaner.
Pro Tip: When formulating nutrient solutions, always test your tap water first. Water mineral content affects nutrient formulation significantly, and calcium deficiency is one of the most common avoidable problems in home hydroponic systems.
Best plants for soilless systems
Not every plant is equally suited to soilless growing, and choosing the wrong one for your first setup leads to frustration rather than confidence.
Plants that perform exceptionally well include:
- Lettuce and salad greens: Fast-growing, shallow-rooted, and forgiving of minor nutrient fluctuations
- Basil, mint, cilantro, and other herbs: Thrive in water culture and taste the same or better than soil-grown versions
- Kale and spinach: Well suited to soilless growing with strong yields in DWC or NFT systems
- Tomatoes: One of the most popular soilless crops; nutrient needs shift from vegetative to fruiting stage, so you’ll need to adjust your solution
- Peppers and chili peppers: Productive in substrate culture or DWC; they reward consistency
- Strawberries: Work well in NFT channels or hanging pocket planters and produce clean fruit
Plants that are less practical for home soilless systems include:
- Root vegetables like carrots, radishes, and beets: These need deep, uniform growing media that’s hard to replicate without soil
- Corn: Its root structure and height make it impractical for any indoor or small-scale soilless setup
- Vining crops like squash or pumpkins: Not impossible, but they require large systems and significant structural support
For your first setup, stick with lettuce or a fast-growing herb. You’ll see results in two to three weeks, which builds confidence and helps you understand how your system behaves before you scale up.
How to start your first soilless setup
Getting started doesn’t require a major investment or any technical background. Here’s a practical sequence that keeps it manageable:
- Choose your method. For a first attempt, a Kratky or basic DWC setup using a five-gallon bucket is the simplest starting point. Both require minimal equipment.
- Get your containers and net pots. Any opaque container that holds liquid works. Opacity matters because light exposure causes algae to grow in your reservoir.
- Select a nutrient solution. Use hydroponic-specific fertilizers, not regular garden fertilizer. Fertilizers for hydroponics differ from soil fertilizers and are formulated for liquid environments to prevent micronutrient deficiencies.
- Rinse your substrate. Whether you use clay pebbles, coir, or perlite, rinse thoroughly before use to remove residual salts that can interfere with plant uptake.
- Test and adjust pH. Aim for a pH of 5.5 to 6.5 for most crops. A basic pH testing kit works fine to start; you’ll adjust using pH up or pH down solutions available at garden or aquarium stores.
- Start seeds or transplant seedlings. Use starter plugs or damp coir to germinate seeds, then transfer to your net pots once the root tips are visible.
- Monitor every two to three days. Check water level, pH, and electrical conductivity (EC, a measure of nutrient concentration). Top off with plain water between full reservoir changes.
The biggest beginner mistake is treating the system like a pot of soil and walking away. You can explore beginner hydroponic setups in more detail when you’re ready to add complexity.
My take on soilless gardening after years of growing
I’ll be direct: soilless gardening changed how I think about growing food in small spaces. When I first tried a basic DWC setup in an apartment, I was skeptical. Lettuce in a bucket? It felt like a science project rather than real gardening.
What surprised me most wasn’t the speed of growth. It was the control. Once I understood how to read the plants and maintain solution chemistry, I stopped having the random crop failures that plagued my container soil work. No fungus gnats. No root rot from overwatering. Clean, predictable harvests.
The mistake I made early on was overcorrecting pH too aggressively. I’d test, see something slightly off, add a correction, and test again ten minutes later without giving the system time to stabilize. Plants that tolerate a pH of 5.8 to 6.2 don’t need you fussing over a 0.2 deviation. Patience matters as much as precision.
My honest advice: don’t start with tomatoes. Start with lettuce. You’ll harvest in three weeks, understand what healthy hydroponic roots look like, and build real confidence before you commit to a longer-cycle crop. The best plants for beginners are always the ones that give you feedback fast.
Soilless growing isn’t a replacement for traditional gardening. It’s an entirely different relationship with plants. One that rewards curiosity and punishes neglect. Worth every bit of the learning curve.
— Povilas
Start growing with Lushygardens
If this article sparked your interest in trying a soilless setup at home, Lushygardens has the practical guides to take you further. The gardening basics for beginners covers everything from plant care fundamentals to setting up your first growing system, without assuming you already know the vocabulary. You’ll find dedicated content on growing herbs hydroponically, step-by-step watering advice that applies equally to soil and soilless setups, and guides tailored to gardeners working in small spaces or challenging climates. Lushygardens is built around practical, honest growing advice, exactly the kind you can actually use on your next growing day.
FAQ
What is soilless gardening in simple terms?
Soilless gardening means growing plants without natural soil, using water-based nutrient solutions or inert physical media like coir or perlite instead. Plants receive all their nutrition directly through a liquid solution, bypassing the need for soil entirely.
Is soilless gardening the same as hydroponics?
Hydroponics is the most common form of soilless gardening, but the two terms aren’t identical. Soilless gardening is the broader category and includes aquaponics, aeroponics, and substrate culture systems alongside traditional hydroponic methods.
What are the biggest advantages of soilless gardening?
The main advantages are water efficiency, faster plant growth, and reduced pest and disease problems. Soilless systems use up to 95% less water than soil farming and allow year-round indoor growing with more consistent results.
Is soilless gardening sustainable?
Yes, when managed well. The significant water savings and ability to grow food locally without land clearing make soilless systems more resource-efficient than many conventional farming practices, particularly in water-scarce or urban environments.
What plants are best for beginner soilless gardeners?
Lettuce, basil, mint, kale, and spinach are the top choices for beginners. They grow quickly, tolerate minor nutrient fluctuations, and give you visible results within weeks, making them ideal for learning how your system behaves.
Recommended
- Boost Plant Success: Microclimate Gardening Made Simple – Lushy Gardens
- Preparing Soil for Planting: Achieve Healthy Growth Easily – Lushy Gardens
- No Dig Gardening Explained: Principles and Benefits – Lushy Gardens
- Understanding the Importance of Soil Testing for Gardens – Lushy Gardens

I’m Eleanor, a seasoned gardener with over three decades of experience tending to Mother Nature’s creations. Through Lushy Gardens, I aim to share my wealth of knowledge and help fellow plant enthusiasts uncover the wonders of gardening. Let’s dive into this journey together, one leaf at a time.


