
Table of Contents
TL;DR:
- A mini greenhouse transforms a small space into a productive year-round growing area but requires strategic location and consistent climate management.
- Proper ventilation, plant grouping, regular cleaning, and the use of tools like grow lights and automatic vents help maintain ideal conditions.
- Successful gardeners treat their mini greenhouse as a living system, monitoring daily and making small adjustments to ensure plant health.
A mini greenhouse can turn a spare corner of your yard or balcony into a productive growing space year-round. But most beginners run into the same frustrating problems: plants overheating, humidity going haywire, seedlings damping off overnight. These mini greenhouse tips are built around what actually works, not what looks good on paper. Whether you are just getting started or trying to squeeze more out of a setup you already have, this guide gives you specific, proven strategies for climate control, plant selection, maintenance, and smart tool use.
Table of Contents
- Key takeaways
- 1. Choose the right location for your mini greenhouse setup
- 2. Get climate and humidity control right from the start
- 3. Pick the best plants for your mini greenhouse
- 4. Master the fundamentals of mini greenhouse maintenance
- 5. Use tools and techniques to get more from your setup
- My honest take after years of watching gardeners struggle with mini greenhouses
- Take your mini greenhouse further with Lushygardens
- FAQ
Key takeaways
| Point | Details |
|---|---|
| Location determines success | Place your mini greenhouse where it gets 6+ hours of direct sun and is shielded from strong wind. |
| Monitor climate daily | Use a thermometer and hygrometer together to catch temperature and humidity problems before they damage plants. |
| Match plants to your space | Herbs, leafy greens, and compact fruiting plants are the most reliable choices for mini greenhouse environments. |
| Clean regularly to prevent disease | Washing your structure 1 to 2 times per year with mild soap stops fungal problems before they start. |
| Automate what you can | Vent openers and grow light timers reduce the daily burden and protect plants when you cannot be there. |
1. Choose the right location for your mini greenhouse setup
Where you place your mini greenhouse matters more than almost any other decision you make. Get this wrong and you fight temperature swings, poor growth, and wind damage every single week.
Start with sunlight. Your structure needs at least six hours of direct sun per day. South-facing or west-facing positions work best in most parts of North America. Avoid spots shaded by trees, fences, or buildings for most of the day.
Beyond sun exposure, think about wind. Mini greenhouses are lightweight by design, and an exposed position can flatten a tier shelf model or collapse a plastic-covered frame on a gusty afternoon. Position the structure against a wall or fence for natural wind protection, and use ground stakes or sandbags for added security.
Also consider your own access. You will be opening and checking this structure every single day, so do not place it somewhere inconvenient. Easy access means you actually maintain it properly.
- Choose a south or west-facing position for maximum light
- Keep the greenhouse away from overhanging trees that drop debris
- Place near a water source to make daily watering easier
- Use a level, stable base such as paving slabs or a compact gravel bed
Pro Tip: Set up your mini greenhouse near a light-colored wall. The wall reflects extra light back onto your plants and also absorbs daytime heat that slowly radiates back at night, which helps prevent cold snaps from shocking seedlings.
2. Get climate and humidity control right from the start
This is where most beginners lose their plants. Mini greenhouse climate control is not complicated, but it does require consistent attention and the right tools.
The ideal temperature range for most vegetable and herb crops sits at 18 to 24°C during the day and 12 to 15°C at night. Go above that for extended periods and you stress plants, invite pests, and trigger bolting in leafy greens. Drop too low and seedlings stall or die.
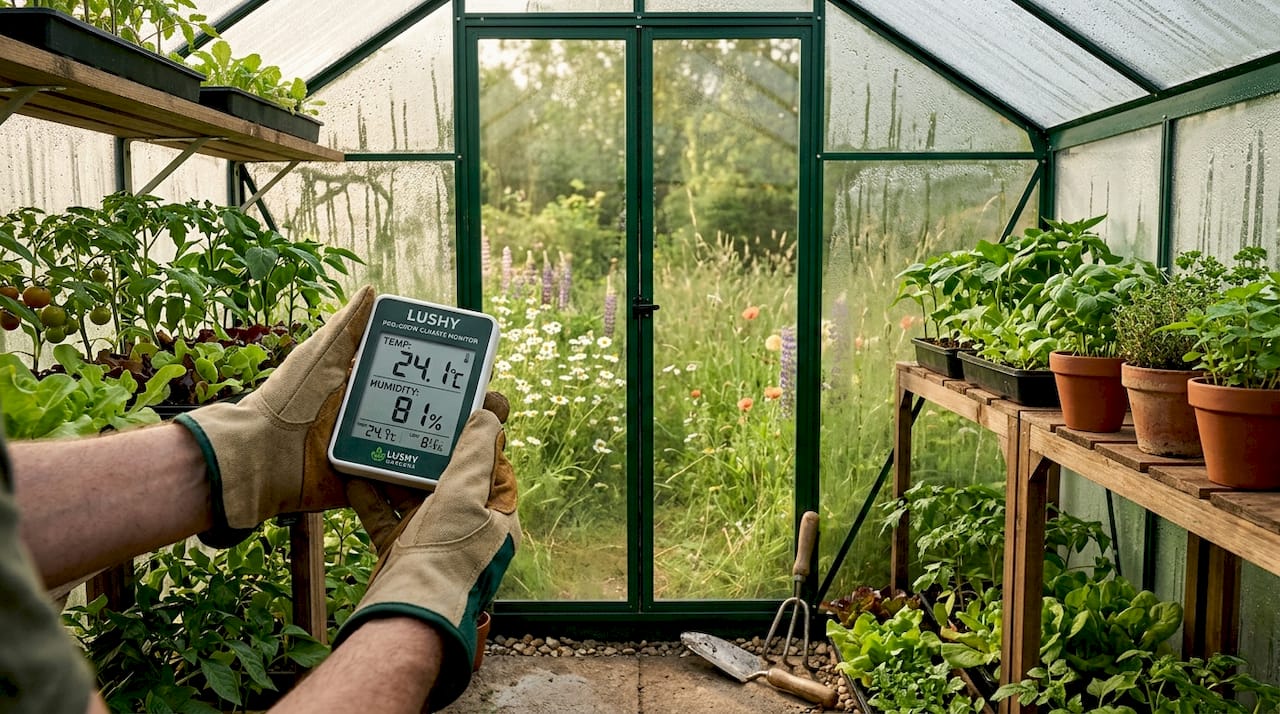
Use a combined thermometer and hygrometer. These small devices cost under $15 and give you real-time readings of both temperature and humidity. Check them every morning. You will spot problems hours before your plants show visible symptoms.
Ventilation is your first line of defense. Proper airflow prevents overheating and excess humidity, which are the two primary causes of mold, mildew, and root rot in enclosed growing spaces. On warm days, open vents or roll up the sides of your cover for several hours.
Humidity management works in both directions. If your space is too dry, misting your plants and placing water trays with pebbles under pots raises moisture levels effectively. If it is too humid, better ventilation and spacing plants further apart will help.
Pro Tip: On unexpectedly warm spring days, temperatures inside a closed mini greenhouse can spike to damaging levels within an hour. Crack the vents or door before you leave for work, not when you get back.
3. Pick the best plants for your mini greenhouse
Not every plant thrives in a compact, enclosed space. The best plants for a mini greenhouse are those that do not need much horizontal room, respond well to controlled conditions, and have reasonable light requirements.
Herbs are the classic starting point. Basil, cilantro, parsley, and chives grow quickly, tolerate humidity fluctuations, and are genuinely useful in the kitchen. For smart indoor herb growing tips, starting with these four gives you fast wins early on.
Leafy greens such as lettuce, spinach, arugula, and chard are excellent choices because they mature quickly and you can harvest them repeatedly. Most herbs and salad crops are ready in 4 to 6 weeks, while fruiting plants like tomatoes and peppers take 8 to 12 weeks from transplant.
Grouping plants by similar light and water requirements makes your daily care routine much simpler. Put moisture-loving plants together and drought-tolerant herbs on separate shelves. This keeps you from overwatering one group while trying to keep another happy.
| Plant type | Time to harvest | Best shelf position | Notes |
|---|---|---|---|
| Herbs (basil, cilantro) | 4 to 6 weeks | Top shelf, most light | Pinch flowers to extend harvest |
| Leafy greens (lettuce, spinach) | 3 to 5 weeks | Middle shelf | Bolt in high heat; ventilate well |
| Compact tomatoes | 8 to 12 weeks | Bottom shelf or floor | Need support stakes even in pots |
| Strawberries | 6 to 8 weeks | Any level | Good for beginning of season |
Practice staggered sowing to keep harvests continuous. Instead of planting all your lettuce at once, sow a new tray every two weeks. This avoids the feast-or-famine cycle that catches many beginners off guard.
4. Master the fundamentals of mini greenhouse maintenance
Good maintenance is not glamorous, but it is the difference between plants that thrive all season and a structure that becomes a breeding ground for pests and disease.
Here is a numbered routine that keeps your mini greenhouse in top shape:
- Check plants daily. Look under leaves for signs of aphids, fungus gnats, or whitefly. Early detection means easy treatment.
- Water based on soil, not schedule. Stick your finger an inch into the soil. If it still feels damp, wait. Overwatering is more common than underwatering in enclosed spaces.
- Remove dead leaves and spent plants immediately. Decaying plant matter is a fast track to fungal problems. Do not let it sit.
- Clean your structure thoroughly at least once a year. Washing with mild soap or a diluted disinfectant once or twice per year removes fungal spores, algae, and pest eggs from covers and frames.
- Check drainage after every watering. Pots that sit in standing water develop root rot quickly. Empty trays within an hour of watering.
- Inspect covers and zippers. Tears in plastic covers let in cold air and pests. A small patch repair kit saves the whole season.
- Adjust plant spacing as they grow. What fits neatly in spring becomes overcrowded by midsummer. Thin or relocate plants before crowding becomes a problem.
For a broader look at container plant maintenance that applies well to mini greenhouse setups, Lushygardens has detailed resources worth reading through.
Pro Tip: Keep a small notebook or phone note with the date you last cleaned, watered, and treated for pests. Memory fails. Records do not. This five-second habit prevents the “Did I water yesterday?” guessing game entirely.
5. Use tools and techniques to get more from your setup
Once the basics are solid, a few well-chosen additions can significantly increase what your mini greenhouse produces and how little time you spend managing it.
Grow lights are the single most useful upgrade for anyone growing through winter or in a low-light location. LED grow lights set on timers give plants consistent photoperiods even when natural light is unreliable. An 18-hour-on, 6-hour-off cycle works well for most seedlings and herbs.
Automatic vent openers are inexpensive and genuinely valuable. These wax-filled devices open vents at a preset temperature and close again as it cools. They require no electricity and no apps. They just work, even when you forget.
For temperature buffering on cold nights, place large dark-colored containers of water inside the structure. Water absorbs heat during the day and releases it slowly overnight, reducing the overnight temperature drop by several degrees without any energy cost.
- Use a basic hydroponics setup for growing herbs without soil mess, especially in tight indoor spaces
- Add bubble wrap insulation to the interior panels in winter for extra cold protection
- Use a timer-controlled heat mat under seedling trays to maintain consistent germination temperatures
- Set a recurring phone reminder for monthly pest inspections so they do not slip through the cracks
A mini greenhouse can extend your growing season by up to 3 months compared to outdoor-only gardening. The right tools make that extended season far easier to manage.
Entry-level models are available starting around $9, which means there is virtually no barrier to getting started. Invest the savings in a good thermometer, a hygrometer, and a timer for your grow light, and you have covered the three most important control points.
My honest take after years of watching gardeners struggle with mini greenhouses
I have seen a lot of beginners set up mini greenhouses with real enthusiasm and then quietly abandon them after a few months. The reason is almost never the plants. It is the expectation that a small structure runs itself.
What I have learned is that the gardeners who succeed treat their mini greenhouse like a living thing that needs a quick daily check-in, not a set-it-and-forget-it appliance. Five minutes each morning to check temperature, soil moisture, and any visible pest activity is genuinely enough. Skip that for a week and you will come back to a mold outbreak or a whitefly colony.
I also think beginners consistently underestimate ventilation. They worry about cold killing their plants and keep everything sealed tight, when in reality the heat and humidity buildup is what kills most seedlings. Open that structure up on any day above 15°C, even in early spring.
The microclimate strategies that experienced growers use are not complicated. They come down to observation and small adjustments made early and often. Technology helps, but your eyes and hands are still the best tools you have. Start simple, monitor consistently, and scale up when you understand your specific setup. That approach works every time.
— Povilas
Take your mini greenhouse further with Lushygardens
If this article got you thinking about what else you could grow and how to care for it properly, Lushygardens has resources that go much deeper. Start with the beginner’s gardening guide if you are still building your foundational knowledge. It covers soil, light, and plant care in a way that directly supports what you are doing in a mini greenhouse. For those already comfortable with the basics, the seasonal maintenance guide helps you plan what to grow and how to care for your structure through each part of the year. You will also find detailed advice on optimal plant watering and a daily plant care checklist to keep everything on track.
FAQ
What are the most important mini greenhouse tips for beginners?
Focus on location first, then climate monitoring. Place your structure in a spot with at least six hours of direct sun, check temperature and humidity daily with a simple gauge, and start with forgiving plants like herbs and leafy greens before moving to fruiting crops.
How do you control temperature inside a mini greenhouse?
Ventilate on warm days by opening vents or rolling up the plastic cover, and use dark water containers inside to buffer cold nights. For more precision, automatic vent openers respond to heat without requiring electricity or a timer.
What plants grow best in a mini greenhouse?
Herbs such as basil and parsley, leafy greens like lettuce and spinach, and compact fruiting plants like dwarf tomatoes perform well. Herbs and salad plants typically reach harvest stage in 4 to 6 weeks, making them ideal for beginners.
How often should you clean a mini greenhouse?
Clean your mini greenhouse one to two times per year using mild soap or a diluted disinfectant. This removes fungal spores, algae, and pest eggs that accumulate on covers and frames over the growing season.
Can a mini greenhouse be used year-round?
Yes. With the right insulation, grow lights, and a small heat source, many gardeners use mini greenhouses through winter. They can extend your growing season by approximately three months compared to open-air gardening.
Recommended
- Essential Tips for Small Garden to Maximize Your Space – Lushy Gardens
- Smart Container Gardening Ideas for Urban Gardeners – Lushy Gardens
- Boost Plant Success: Microclimate Gardening Made Simple – Lushy Gardens
- Essential Indoor Gardening Tips for Urban Dwellers – Lushy Gardens

I’m Eleanor, a seasoned gardener with over three decades of experience tending to Mother Nature’s creations. Through Lushy Gardens, I aim to share my wealth of knowledge and help fellow plant enthusiasts uncover the wonders of gardening. Let’s dive into this journey together, one leaf at a time.


