
Table of Contents
TL;DR:
- Poor drainage is the leading cause of container plant failure, as waterlogged soil suffocates roots within days. Ensuring containers have drainage holes, using amended soil with perlite or pumice, and elevating pots improve water flow and prevent root rot. Regularly inspecting and maintaining drainage pathways helps sustain healthy, thriving container gardens over time.
Poor drainage is the most common silent killer of container plants. Waterlogged soil suffocates roots within days, leaving you with yellowing leaves and a wilting plant you can’t seem to revive no matter how carefully you water. These container garden drainage tips cover everything from choosing the right pot and soil to diagnosing problems you may have accidentally created. By the end, you’ll know exactly how to set up, maintain, and troubleshoot drainage in any container setup.
Table of Contents
- Key takeaways
- What you need for effective container garden drainage
- Step-by-step methods to improve drainage
- Diagnosing common drainage problems
- Maintaining drainage and long-term plant health
- My take on drainage after years of container gardening
- Keep learning with Lushygardens
- FAQ
Key takeaways
| Point | Details |
|---|---|
| Drainage holes are non-negotiable | Every container needs at least one hole; pots without them dramatically increase root rot risk. |
| Soil amendments make a real difference | Adding perlite or pumice to your potting mix improves drainage without sacrificing nutrients. |
| Elevation helps more than you think | Raising containers slightly off the ground allows water to escape freely from drainage holes. |
| Saucers can cause overwatering | Leaving standing water in trays keeps soil saturated and leads to root problems over time. |
| Check moisture before watering | Stick your finger 1 to 2 inches into the soil. If it’s still wet, wait before adding more water. |
What you need for effective container garden drainage
Before you start adjusting anything, it helps to understand what good drainage actually requires. It’s not just about punching a hole in the bottom of a pot and calling it done. The right materials and container choices set the foundation for everything else.
Containers with proper drainage holes
This is the single most important factor. Drainage holes are essential; pots without them trap water and restrict oxygen around the roots, which leads to rot fast. If you’ve fallen for a gorgeous ceramic pot that has no hole, you have two real options: drill one yourself using a masonry or tile bit, or use it as a decorative outer sleeve for a plain plastic pot that does have holes.
The number and size of holes matters too. A single small hole at the bottom of a wide, shallow planter won’t drain fast enough after heavy rain or deep watering. Multiple holes spread across the base do a far better job.
The best soil for container drainage
Standard garden soil is too dense for pots. It compacts quickly, restricts airflow, and holds water far longer than roots can tolerate. You need a potting mix specifically designed for containers, and even then, most benefit from amendments.
Soil amendments like perlite, pumice, or vermiculite improve drainage by physically opening up the soil structure, creating air pockets that let excess water move through instead of sitting around roots. A ratio of roughly 70% quality potting mix to 30% perlite works well for most plants. Succulents and cacti need an even coarser blend, often 50/50.
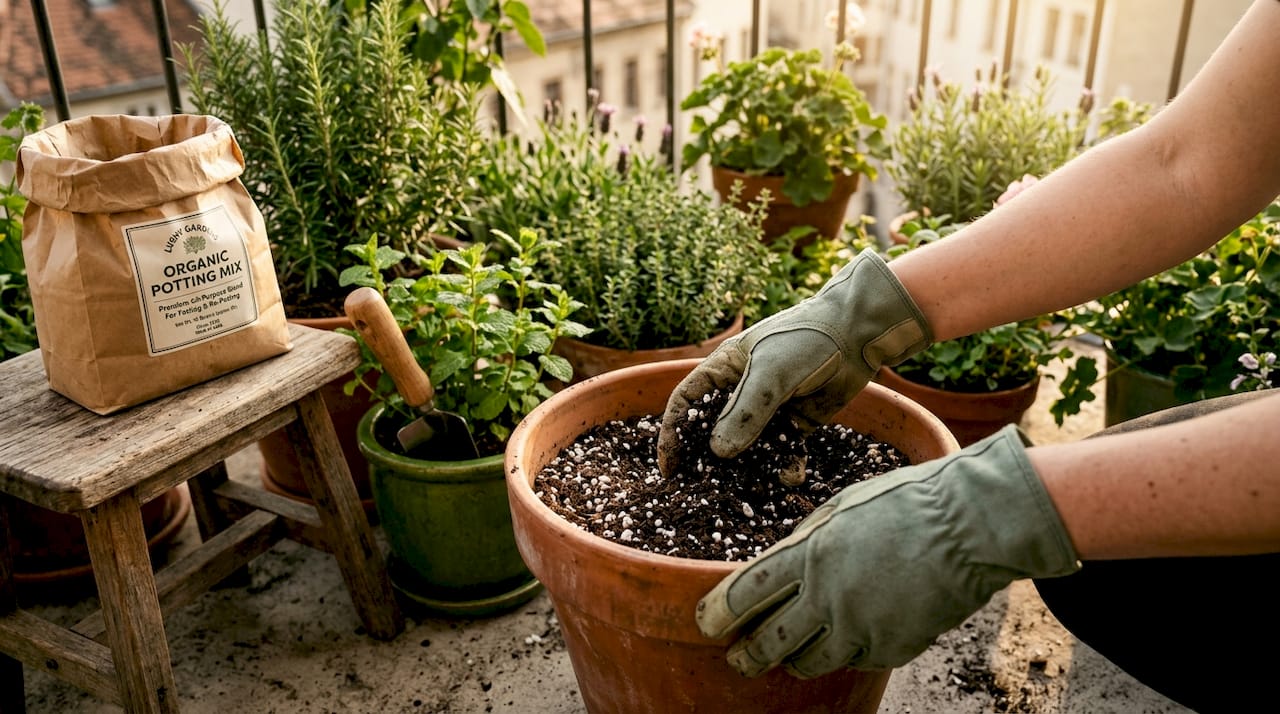
Pro Tip: Avoid potting mixes labeled “moisture control” or “moisture retention” for plants that prefer drier conditions. These mixes are engineered to hold water longer, which works against drainage for many herbs, vegetables, and Mediterranean plants.
Here’s a quick comparison of common drainage materials:
| Material | Drainage benefit | Best used for |
|---|---|---|
| Perlite | Excellent aeration | Most container plants |
| Pumice | Heavy and stable | Large or outdoor pots |
| Coarse sand | Moderate drainage | Succulents, herbs |
| Vermiculite | Retains some moisture | Seedlings, moisture lovers |
| Gravel layer | Water escape at base | Decorative outer pots only |
Other tools and materials
A few extras make managing drainage solutions for pots much easier:
- Plant stands or pot feet: Raise your container so water drains freely from the holes rather than pooling underneath.
- Mesh or landscape fabric: Place a small piece over the drainage hole before adding soil. It keeps soil from washing out while letting water pass through.
- Moisture meter: Cheap but useful. Takes the guesswork out of when to water, especially in large pots where surface dryness can be misleading.
Step-by-step methods to improve drainage
Once you have the right materials, here’s how to actually put them to work across different container setups.
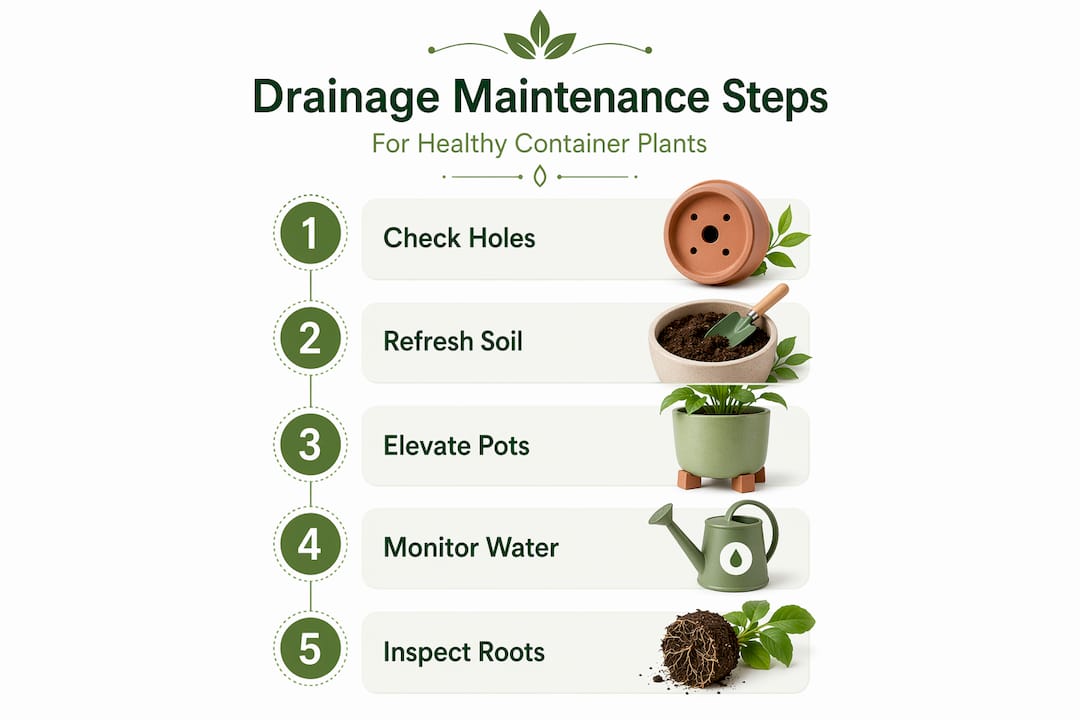
- Check and clear existing drainage holes. Before anything else, confirm the holes aren’t blocked by compacted soil or roots. Push a pencil or stick through from the outside. If you’re repotting, rinse the pot and inspect each hole directly.
- Enlarge or add holes if needed. For plastic or terracotta pots, a cordless drill does this in seconds. Space additional holes evenly across the base for more even drainage. A 1/2 inch hole is a good minimum size.
- Use mesh over the holes. Cut a small square of window screen or fine mesh and lay it over each hole before adding soil. This stops drainage materials from washing out without blocking water flow.
- Amend your potting mix. Mix perlite or pumice into your potting medium before filling the pot. This changes the physical structure of the mix so water moves through it rather than pooling.
- Elevate the container. Raising containers slightly off any solid surface lets gravity do its job. Even an inch of clearance using pot feet or a wooden block makes a difference, especially on patios where water can pool under flat-bottomed pots.
- Use an inner pot for large decorative containers. Large decorative containers benefit from inner pots elevated by bricks or stands inside the outer pot. The inner pot drains into the air gap below it, the outer pot keeps things looking polished, and you can swap plants without disturbing the whole setup.
Pro Tip: Skip the traditional gravel layer at the bottom of your pot. Recent research shows gravel can actually create a “perched water table,” where water sits just above the gravel line rather than draining through. Amending your soil mix does more good with fewer downsides.
One comparison worth knowing: a well-amended soil mix outperforms a gravel drainage layer in almost every scenario. Gravel adds weight and can trap water above it. Perlite mixed throughout the soil changes how water moves through the entire root zone, which is where it counts.
Diagnosing common drainage problems
Even with the right setup, things go wrong. Knowing what to look for saves plants before the damage becomes permanent.
Signs your drainage is failing:
- Yellow or pale leaves that appear despite regular watering
- Soil that feels wet or soggy several days after the last watering
- A sour or musty smell coming from the potting mix
- Wilting despite moist soil (this is the classic overwatering trap)
- Brown, mushy roots when you slide the plant out of its pot
Wilting is where a lot of gardeners get fooled. Wilting can come from overwatering just as much as from underwatering. When roots sit in waterlogged soil, they can’t absorb oxygen, and the plant droops exactly the same way it would from drought. Adding more water at this point makes things worse.
How to check moisture correctly:
Insert your finger 1 to 2 inches into the soil. If it feels wet at that depth, skip watering for now. A moisture meter inserted into the center of the pot is even more reliable because large pots often feel dry on top while staying saturated at the root zone.
Overwatered soil needs to dry out before the plant can recover. Stop watering, move the pot to a bright spot with airflow, and make sure drainage holes are fully clear. Only resume watering once the top 1 to 2 inches of soil have dried out completely.
Common mistakes to fix right away:
- Leaving pots sitting in saucers filled with water. Standing water in trays keeps the soil at the base constantly saturated. Empty saucers within 30 minutes of watering.
- Using heavy garden soil in pots instead of a proper potting mix. Garden soil compacts fast and drains poorly in containers.
- Assuming a pot without drainage is fine if you water carefully. It rarely is. Even experienced gardeners misjudge, and without an exit, water has nowhere to go.
If root rot has already started, remove the plant, trim off any black or mushy roots with clean scissors, let the roots air dry briefly, and repot into fresh soil in a clean container with working drainage holes. Check out the signs of overwatering guide at Lushygardens for a deeper breakdown of what to look for before it gets to that stage.
Maintaining drainage and long-term plant health
Getting drainage right at planting time is only half the job. Keeping it working over months and seasons is what separates thriving container gardens from struggling ones.
Proper drainage supports root aeration, boosts nutrient uptake, and promotes deeper root growth. When roots get access to both water and oxygen in the right balance, plants grow more efficiently and resist disease better.
Here’s what good long-term container plant care looks like in practice:
- Check drainage holes monthly. Roots, algae, and compacted soil can slowly block them. A gentle poke with a skewer clears most minor blockages.
- Adjust watering by season. Plants need far less water in fall and winter when growth slows. Checking soil moisture 1 to 2 inches deep before watering is a year-round habit, not just a summer one.
- Refresh potting mix annually. Soil breaks down over time, becomes compacted, and loses its drainage capacity. A yearly top-up or full repot restores structure.
- Repot when roots fill the container. Root-bound plants can block drainage holes from the inside and also stress the plant by limiting growth.
- Choose the right pot size. Oversized containers hold more soil than the plant’s roots can dry out between waterings, which keeps the lower half perpetually wet. Match pot size to plant size and scale up gradually.
Well-draining soil mixes play a role in soil aeration that is just as important as the holes themselves. Think of it this way: a hole at the bottom means nothing if the soil acts like a sponge and never releases the water in the first place.
My take on drainage after years of container gardening
I’ve killed more plants through overwatering than anything else. Not because I watered on a rigid schedule or ignored warning signs. I killed them because I underestimated how much drainage setup at the beginning actually matters.
In my experience, most gardeners treat drainage as an afterthought. They buy a beautiful pot, fill it with whatever potting soil the nursery had on the shelf, and water when the top feels dry. That works until it doesn’t. And by the time the plant shows symptoms, the root damage is often already done.
The biggest misconception I see is that adding gravel to the bottom of a pot improves drainage. It sounds logical. Water flows down, gravel is porous, problem solved. But the perched water table issue is real, and I’ve watched it drown plants in pots that looked like they had perfect drainage from the outside. Mixing perlite through the entire soil volume changed my results completely.
What actually surprised me was how much elevation matters. I started using simple pot feet under all my containers, and the difference in how quickly soil dried after watering was noticeable. Especially on concrete patios where capillary action from the surface would keep the bottom of the pot damp for far longer than it needed to be.
My honest advice: spend five extra minutes on drainage setup before you plant anything. Amend your soil, check your holes, elevate the pot. That’s the container plant care routine that pays back every single time.
— Povilas
Keep learning with Lushygardens
If these tips sparked your interest in growing stronger, healthier container plants, Lushygardens has everything you need to keep going. The beginner gardening guide walks through soil, watering, and plant selection from scratch, making it a perfect next read whether you’re just starting out or rebuilding your approach after some frustrating losses. For ongoing care, the optimal watering guide breaks down exactly when and how much to water by plant type and season. You can also explore the container gardening tips collection for more on selecting pots, improving soil, and keeping roots happy year-round.
FAQ
What is the best way to improve drainage in a container?
Amend your potting mix with perlite or pumice before planting, confirm drainage holes are open, and elevate the pot off any solid surface. These three steps together create the best conditions for water to move through and exit freely.
Do I need a gravel layer at the bottom of my pot?
No. Research shows a gravel layer at the base can create a perched water table, trapping water just above the gravel rather than draining it. Mixing perlite throughout the soil is a more effective drainage solution for pots.
How do I know if my container plant has a drainage problem?
Look for soggy soil that stays wet several days after watering, yellowing leaves, a sour smell from the pot, or wilting despite moist soil. These are all signs that water is not moving through the container correctly.
How often should I water container plants?
Check soil moisture 1 to 2 inches below the surface before watering. For many plants, watering every 2 to 3 days works in warm months, but always let the top of the soil guide you rather than a fixed schedule.
Can I use a pot without a drainage hole?
It’s possible but risky. Without drainage holes, even careful watering can lead to waterlogged soil and root rot over time. If you love the look of a hole-free pot, use it as a decorative outer container with a draining inner pot placed inside.
Recommended
- Smart Container Gardening Ideas for Urban Gardeners – Lushy Gardens
- Top hydration tips for gardeners: optimal watering made easy – Lushy Gardens
- Essential Indoor Gardening Tips for Urban Dwellers – Lushy Gardens
- 7 Essential Container Gardening Tips for Success – Lushy Gardens

I’m Eleanor, a seasoned gardener with over three decades of experience tending to Mother Nature’s creations. Through Lushy Gardens, I aim to share my wealth of knowledge and help fellow plant enthusiasts uncover the wonders of gardening. Let’s dive into this journey together, one leaf at a time.


