
Table of Contents
TL;DR:
- DIY plant art projects combine botanical materials and creative techniques to produce personalized home decor. Using materials like polymer clay, plaster, and beads, crafters can create air plant holders, botanical reliefs, and sculptural plant representations. Starting with simple projects such as polymer clay holders offers an affordable, accessible way to explore floral crafts and deepen observation skills.
DIY plant art projects are handmade crafts that use botanical materials, living plants, or plant-inspired forms to create decorative art and functional home pieces. The craft category spans techniques from polymer clay sculpting and botanical plaster casting to beaded plant construction and leaf printing. Each method produces something genuinely personal. Lushygardens covers the full range of these projects because they sit at the intersection of plant care and creative expression. Whether you want botanical wall art for a bare hallway or a textured clay holder for your air plant collection, the right materials and a clear process make the difference between frustration and a finished piece you are proud to display.
What materials do you need for DIY plant art projects?
The right supplies determine whether your project succeeds or stalls. Across the most popular plant art formats, a core set of materials covers most of what you need.
Core materials by project type:
- Polymer clay (Sculpey or Premo brands work well): used for air plant holders, small sculptures, and textured tiles. Costs roughly $3–$6 per block.
- Plaster of Paris: the standard medium for botanical bas-relief casting. Available at hardware and craft stores for under $10 per bag.
- Craft wire (20–26 gauge): the backbone of beaded plant stems and leaf frames.
- Seed beads and bugle beads: used to mimic foliage and flower petals in beaded plant art.
- Pressed or dried botanicals: leaves, ferns, and flowers used in plaster casting and leaf printing.
- Acrylic paint and brushes: for finishing plaster pieces and creating leaf print art.
- Murphy’s Oil Soap: the go-to release agent for plaster molds. A small bottle costs under $5 and prevents permanent bonding.
Tools you will use repeatedly:
A rolling pin, silicone molds, wire cutters, needle-nose pliers, and a standard kitchen oven cover the needs of most projects. For budget-friendly sourcing, dollar stores and thrift shops stock silicone baking molds that double as clay forms.
| Supply | Primary use | Approx. cost |
|---|---|---|
| Polymer clay (2 oz block) | Air plant holders, tiles | $3–$6 |
| Plaster of Paris (4 lb bag) | Botanical relief casting | $8–$10 |
| Craft wire (20 gauge, 30 ft) | Beaded plant stems | $4–$6 |
| Seed beads (1 oz pack) | Beaded leaves and petals | $2–$4 |
| Murphy’s Oil Soap (16 oz) | Mold release agent | $4–$5 |
| Acrylic paint set | Finishing and leaf printing | $6–$12 |
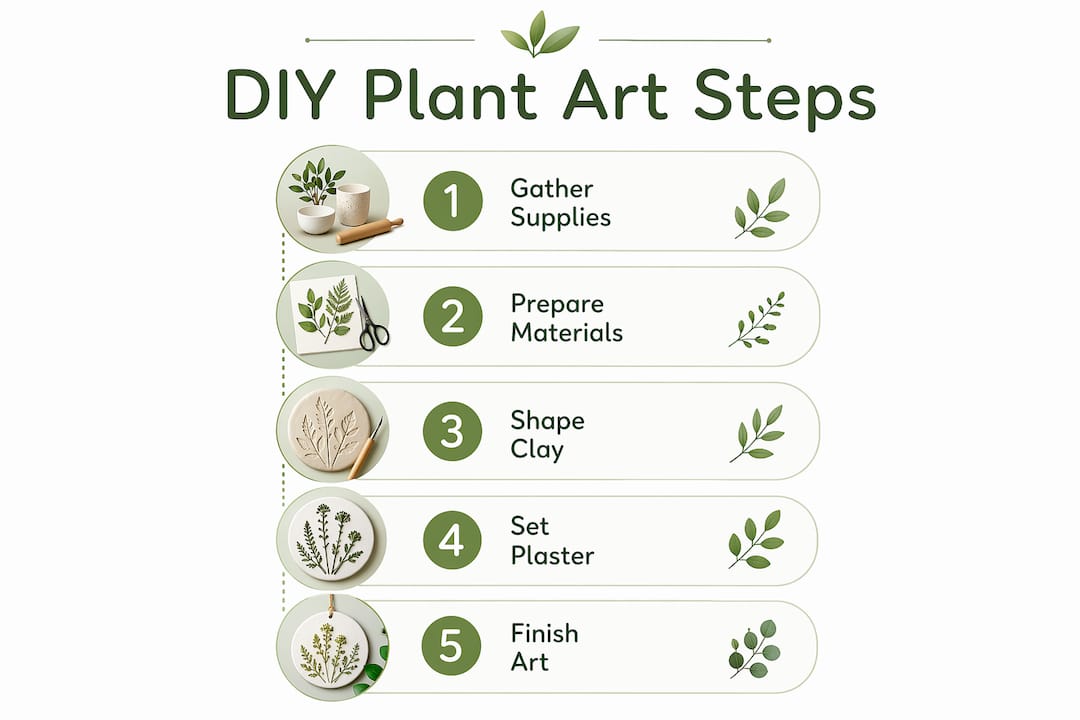
Sourcing tip: buy polymer clay and plaster in multipacks. The per-unit cost drops significantly, and you will use both materials across multiple projects.
How to make polymer clay air plant holders
Polymer clay air plant holders are among the most accessible plant art projects you can make. The average cost runs $8–$15, and most people finish their first holder in under an hour. That low barrier makes this the ideal starting point for anyone new to plant crafts.
Step-by-step instructions:
- Condition the clay. Knead a 2 oz block of polymer clay for 3–5 minutes until it is soft and pliable. Cold clay cracks when shaped, so warm it in your hands first.
- Choose your shaping method. The pinch pot method works for beginners: press your thumb into the center of a clay ball and pinch outward to form a small bowl. For a cone shape, roll the clay into a ball, then press it over a cone-shaped mold. For textured finishes, press a leaf or lace fabric into a flattened slab before shaping.
- Refine the shape. Smooth any cracks with a damp fingertip. Make the opening wide enough to cradle your air plant without forcing it in.
- Bake according to the clay brand’s instructions. Most polymer clays bake at 275°F for 15 minutes per quarter inch of thickness. Overbaking causes discoloration; underbaking leaves the piece brittle.
- Cool completely before handling. Let the holder sit at room temperature for 30 minutes after baking. Rushing this step causes warping.
- Place your air plant. Polymer clay is non-porous, so it provides no drainage. Air plants absorb moisture from the air and need no soil, making them the perfect match for these holders.
Pro Tip: Press a piece of burlap or a textured silicone mat into the clay surface before shaping. The impression creates a natural, woven look that photographs beautifully and hides minor fingerprint marks.
Air plants like Tillandsia ionantha and Tillandsia xerographica sit well in pinch pot holders. For light requirements, Lushygardens covers air plant sun needs in detail. Matching the right plant to your holder turns a craft project into a living display.
How to make botanical plaster casts and floral relief art
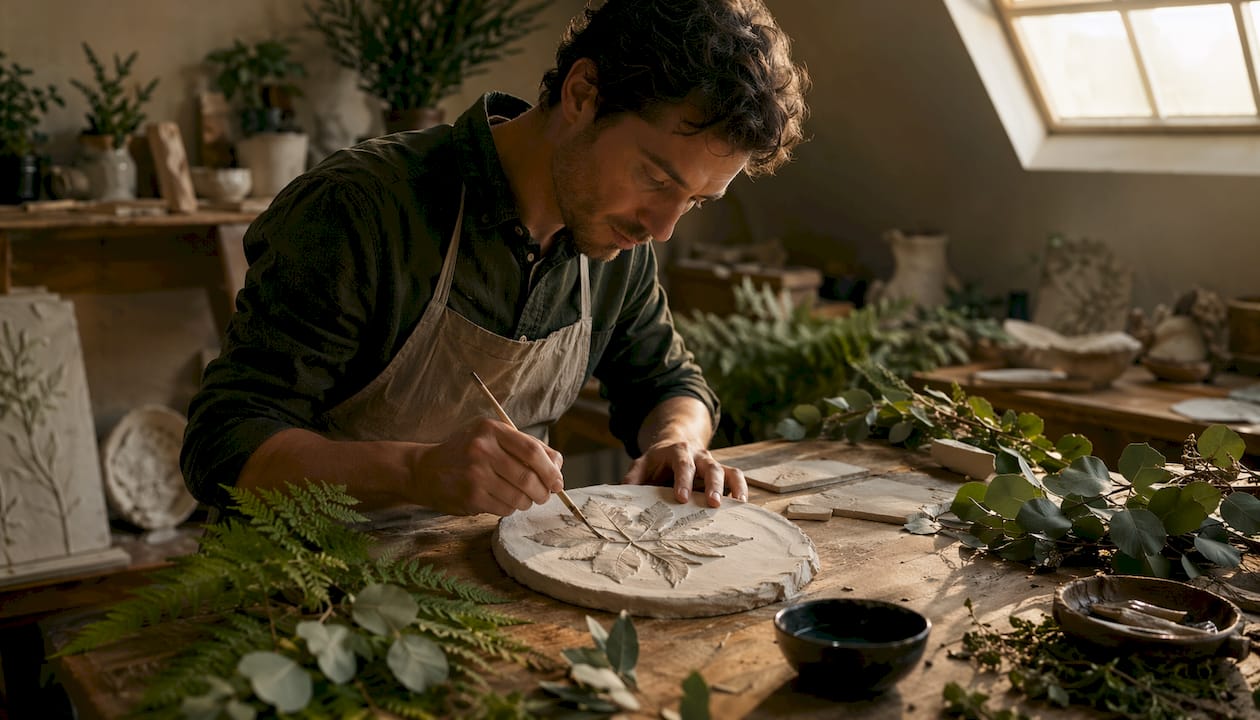
Botanical plaster casting, also called bas-relief art, produces a raised impression of a leaf or flower preserved permanently in plaster. The technique is older than most people realize. Craftspeople have used plaster casting to record botanical forms since the 18th century. The modern DIY version is faster and more forgiving.
Step-by-step process:
- Select and dry your botanicals. Ferns, large leaves, and flat flowers work best. Avoid fresh, water-heavy leaves. Moisture is the leading cause of failure in plaster casting, causing cracking and staining. Press leaves between paper towels for 24 hours before use.
- Prepare your clay base. Roll air-dry clay or oil-based modeling clay into a flat slab about half an inch thick. Press your botanical firmly into the clay, vein side down, to create a negative impression. Remove the botanical carefully.
- Seal the mold. Brush a thin coat of Murphy’s Oil Soap over the clay impression. This release agent prevents the plaster from bonding permanently to the mold.
- Mix the plaster. Add plaster of Paris to water (not water to plaster) at roughly a 2:1 ratio by volume. Stir slowly for 2–3 minutes until the consistency resembles thick cream. Avoid whipping air into the mix.
- Pour and tap. Pour the plaster into the mold and tap the surface gently to release air bubbles. Plaster sets in 10–15 minutes and can be removed from the mold after about 1 hour.
- Cure fully before finishing. Full curing takes 24 hours. Painting or sealing a piece before it cures traps moisture and causes the surface to flake.
- Paint and seal. Apply thin layers of acrylic paint with a dry brush to highlight the raised botanical details. A matte sealer protects the finished piece.
Skipping the mold release step is the single most common beginner mistake in plaster casting. Without Murphy’s Oil Soap or a similar agent, the plaster bonds directly to the clay, and removing it destroys both the mold and the cast. Seal every surface the plaster will touch, every time.
Pro Tip: Choose botanicals with strong vein structure, like ferns, oak leaves, or hostas. Fine, delicate petals often collapse under the weight of the plaster before it sets.
Applying thin, even paint layers preserves the vein detail that makes botanical relief art so striking. Heavy paint fills the recessed lines and flattens the effect you worked to create.
Creating beaded plant art: materials, techniques, and display ideas
Beaded plant art produces permanent, low-maintenance botanical pieces that never wilt. Prep time runs 30–120 minutes depending on the size and complexity of the piece. The result is a sculptural plant form that works as shelf decor, a gift, or a centerpiece.
What you need:
- Seed beads in green, white, and accent colors
- 24 or 26 gauge craft wire (thinner wire bends more easily around small beads)
- Needle-nose pliers and wire cutters
- Floral foam or a small pot filled with sand to anchor finished stems
- Optional: floral tape to wrap exposed wire sections
Core techniques:
The basic unit of beaded plant art is the beaded loop. Thread 5–10 beads onto a wire, then twist the wire ends together to form a small oval. This oval becomes a leaf or petal. String multiple loops onto a central stem wire, spacing them to mimic natural leaf placement. Twist each loop wire tightly around the stem so it holds position without slipping.
For stems, wrap a longer piece of wire with floral tape before adding leaves. The tape adds thickness and a natural green color that reads as a real stem from a distance. Bunch 3–5 completed stems together and twist their bases into a single anchor point, then press that anchor into floral foam inside a small pot or decorative container.
Display and gifting ideas:
Beaded succulents and cacti are the most popular forms because their geometric shapes translate well into wire and bead structures. A beaded Echeveria in a terracotta pot makes a gift that lasts indefinitely. For home decor, group three beaded plants of different heights on a windowsill or bookshelf. The variation in height creates visual interest without requiring any plant care. For styling ideas that work for both real and beaded plants, Lushygardens has a dedicated guide on houseplant display.
Difficulty scales with ambition. A simple beaded cactus with five stems takes about 30 minutes. A detailed beaded rose with layered petals can take two hours or more. Start with a single-stem succulent to learn the loop technique before moving to multi-layered forms.
What should you do when plant art projects go wrong?
Every crafter hits the same set of problems. Knowing the cause before you start saves time and materials.
Common problems and fixes:
- Plaster cracking after removal: caused by moisture in the botanical or insufficient curing time. Always press botanicals dry and wait the full 24-hour cure period before handling.
- Clay baking unevenly or burning: caused by oven hot spots. Place a ceramic tile under your clay piece and use an oven thermometer to verify the actual temperature.
- Leaf prints with blurry vein detail: caused by too much paint or too much pressure. Thin, evenly applied paint and a light press produce the clearest impressions.
- Plaster bonding to the mold permanently: caused by skipping the release agent. Rinse mixing buckets promptly after use, and coat every mold surface with Murphy’s Oil Soap before pouring.
- Beaded wire unraveling: caused by insufficient twisting at connection points. Twist each joint at least four full rotations and use pliers to tighten the final turn.
Pro Tip: Keep a small spray bottle of water nearby when working with polymer clay. A light mist on your fingertips smooths surface cracks without softening the clay structure.
Imperfection is not failure in botanical art. A slightly bowed plaster leaf or an uneven bead spacing often reads as handmade character rather than error. The goal is a piece that reflects your process, not a factory replica.
Key Takeaways
The most effective plant art projects combine the right material to the right technique: polymer clay for air plant holders, plaster for botanical relief, and wire-and-bead construction for permanent sculptural pieces.
| Point | Details |
|---|---|
| Match material to plant type | Polymer clay suits air plants only; it provides no drainage for soil-based plants. |
| Moisture control is critical | Dry botanicals before casting and always use Murphy’s Oil Soap as a mold release agent. |
| Cure before finishing | Plaster needs a full 24 hours to cure before painting or sealing to prevent flaking. |
| Start small with beadwork | A single-stem beaded succulent teaches the loop technique before you attempt complex forms. |
| Imperfection adds character | Uneven textures and natural asymmetry are features of handmade botanical art, not flaws. |
Why plant art changed how I think about making things
I used to approach crafts the way most people approach recipes: follow the steps exactly, expect a predictable result. Plant art broke that habit. The first time I pressed a fern into clay and poured plaster over it, the result looked nothing like the photo I had used as a reference. The fronds had shifted slightly during the pour, and one edge had a small air bubble. I almost scrapped it.
I did not. I painted it, sealed it, and hung it on the wall. Three people asked me where I bought it.
That experience taught me something the step-by-step guides do not say directly: botanical art is honest about its process. The material records what actually happened, not what you planned. A leaf that moved during casting leaves a trace of that movement in the plaster. A bead that sits slightly off-center on a wire stem catches light differently than its neighbors. These are not mistakes. They are evidence that a person made the thing.
The deeper value of these projects is what they do to your attention. Pressing a leaf into clay forces you to look at it closely, to notice the vein structure and the way the stem connects. You cannot rush that observation. The craft slows you down in a way that is genuinely useful, especially if most of your day is spent on screens. Lushygardens covers decorating with plants from a styling angle, but the making side of plant art adds a dimension that styling alone does not provide.
My honest recommendation: pick one technique, finish one piece, and put it somewhere you will see it every day. The second project will be better. The third will be the one you keep.

Lushygardens resources to grow your plant art practice
Lushygardens covers the full range of plant knowledge that supports creative projects like these. If you are new to working with plants in any form, the beginner gardening guide is the clearest starting point. It covers plant selection, care basics, and how to build confidence with living material before you commit it to clay or plaster. For readers who want to take their indoor plant displays further, the home garden inspiration guide pairs well with the craft techniques covered here. Both resources are free, practical, and written for people who want to do more with plants than simply keep them alive.
FAQ
What plants work best for DIY plant art projects?
Air plants (Tillandsia species) are the best match for polymer clay holders because they need no soil or drainage. Ferns, oak leaves, and hostas produce the clearest impressions in plaster casting due to their strong vein structure.
How long does plaster take to set for botanical casting?
Plaster of Paris sets in 10–15 minutes and can be removed from the mold after about 1 hour. Full curing takes 24 hours before the piece is ready for painting or sealing.
Can beginners make beaded plant art without prior craft experience?
A single-stem beaded succulent requires only the basic loop technique and takes roughly 30 minutes. No prior craft experience is needed, though needle-nose pliers make the wire work significantly easier.
Why does my plaster crack after I remove it from the mold?
Cracking is almost always caused by moisture in the botanical material or removing the cast before it fully sets. Use dried or pressed botanicals and wait at least 1 hour before demolding.
What is the cheapest way to start with plant art crafts?
Polymer clay air plant holders cost $8–$15 in total materials and take under an hour to complete. They require no specialized tools beyond a standard kitchen oven, making them the most accessible entry point into plant-themed home decor.
Recommended
- Creative Ways to Style Houseplants at Home – Lushy Gardens
- Gardening Ideas to Transform Your Home and Indoor Spaces – Lushy Gardens
- DIY Garden Decoration for a Budget-Friendly Makeover – Lushy Gardens
- Fresh home garden inspiration: creative ideas & steps – Lushy Gardens

I’m Eleanor, a seasoned gardener with over three decades of experience tending to Mother Nature’s creations. Through Lushy Gardens, I aim to share my wealth of knowledge and help fellow plant enthusiasts uncover the wonders of gardening. Let’s dive into this journey together, one leaf at a time.


