
Table of Contents
TL;DR:
- A well-thought-out garden plan, including site assessment and layout, is essential for success, not just planting enthusiasm.
- Flexibility and ongoing observation help gardeners adapt to surprises, improving yields and overall garden health.
Many first-time gardeners plant with enthusiasm, water faithfully, and still end up with patchy beds, leggy seedlings, and a long list of what went wrong. The real culprit almost always isn’t the soil or the seeds. It’s the absence of a solid plan made before a single spade hits the ground. A thoughtful, stepwise approach to garden planning can dramatically boost your plant success rate, cut wasted effort, and replace seasonal frustration with genuine harvest pride. This guide walks you through every critical phase, from site assessment to ongoing care, so your garden has the best possible start.
Table of Contents
- What you need before you start: Tools, materials, and site essentials
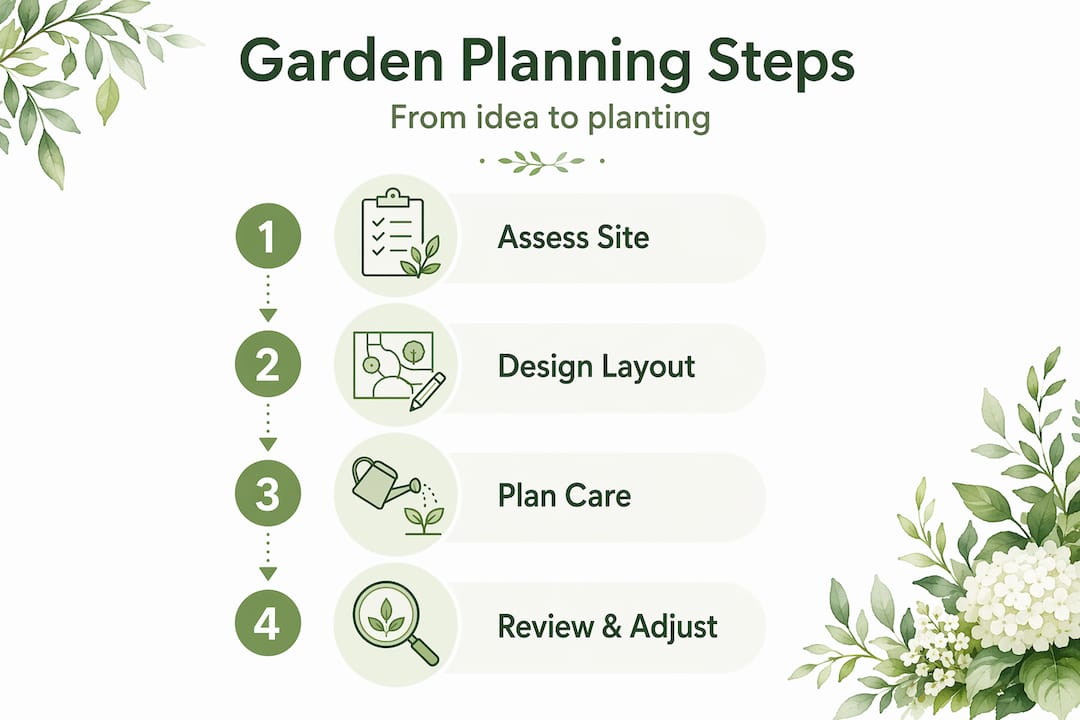
- Step 1: Assess your garden site like a pro
- Step 2: Design beds, paths, and garden layout
- Step 3: Plan planting, watering, and ongoing care
- Step 4: Review, troubleshoot, and adjust your plan
- A seasoned gardener’s take: Why adapting beats perfection
- Ready to bring your garden plan to life?
- Frequently asked questions
Key Takeaways
| Point | Details |
|---|---|
| Start with site assessment | Noting light, soil, and space is essential for a successful foundation. |
| Design for access | Limit bed width and plan paths to make planting and care easier. |
| Prioritize efficient watering | Use drip systems and ensure water sources are accessible for healthy, low-maintenance beds. |
| Expect to adjust | A flexible attitude and willingness to adapt your garden plan will yield the best results. |
What you need before you start: Tools, materials, and site essentials
Now that you know what this guide will teach you, let’s start with the essentials you need before putting pen to paper.
Before you sketch a single bed or buy a seed packet, gather the right tools and information. Skipping this preparation step is one of the biggest reasons beginner gardens underperform. Think of it like building a house: the blueprint comes before the bricks.
Basic tools every beginner should have:
- A garden trowel and hand fork for soil work
- A long-handled spade for turning beds
- A watering can or hose with an adjustable nozzle
- Gardening gloves to protect your hands
- Plant markers or stakes for labeling rows
- A kneeling pad for comfortable ground-level work
Planning materials you’ll need:
- A 25-foot measuring tape (cloth or fiberglass works best)
- Graph paper or a plain notebook for sketching layouts
- A basic soil test kit (available at most garden centers or online)
- A compass or a sun-tracking app to map light patterns
- Colored pencils for marking sun zones on your sketch
| Material | Purpose | Cost estimate |
|---|---|---|
| Measuring tape | Accurate bed and path sizing | $5 to $15 |
| Graph paper | Drawing scaled garden maps | $3 to $8 |
| Soil test kit | Checking pH and nutrient levels | $10 to $25 |
| Sun-tracking app | Mapping daily light patterns | Free to $5 |
| Soil amendment (compost) | Improving nutrient-poor soil | $15 to $40/bag |
For site data, you need to record sunlight hours across different parts of your yard, note any existing structures like fences, sheds, or trees, understand your soil texture, and locate your water sources. As a general rule, growing areas need a minimum of 6 to 8 hours of direct sun. Also, beds no wider than 4 feet allow you to reach the center from either side without stepping into the soil.
If you want a deeper look at how to structure your growing space from scratch, our vegetable garden planning guide is a great companion resource. And for those just getting started, the beginner garden setup article covers everything you need to feel confident on day one.
Pro Tip: Walk your yard at three different times of day, morning, midday, and late afternoon, and take a photo each time. This gives you a visual record of where shade moves and where full sun lands.
Step 1: Assess your garden site like a pro
With your supplies ready, it’s time to take a closer look at your space, the foundation for great garden design.
Site assessment is not optional. It’s the single step that separates gardeners who succeed from those who replant the same beds year after year wondering why things fail. Here is how to do it methodically.
-
Measure your space. Walk the perimeter of your intended garden area with a tape measure. Write down the full dimensions, including paths, permanent structures, and any slopes. Sketch this outline on graph paper using a simple scale, such as 1 inch equal to 4 feet.
-
Check your sunlight. Spend a full day tracking where sunlight falls and for how long. Areas that get 6 to 8 hours are ideal for most vegetables and many flowering plants. Spots with less than 4 hours are better suited to ferns, hostas, or leafy greens.
-
Test your soil. A basic kit will tell you your soil pH and nutrient levels. Most vegetables thrive at a pH between 6.0 and 7.0. Sandy soil drains too fast; clay soil holds too much water. Both can be improved with compost.
-
Locate water access. Mark your nearest outdoor faucets on your sketch. Beds placed far from water sources often end up underwatered, especially during summer heat waves.
-
Create your base map. Once you have measurements, sunlight notes, soil data, and water access marked, combine everything into one simple sketch. This base map including sun exposure is your planning foundation for every decision ahead.
“The best garden plans start with what’s already there, not what you wish was there. Work with your site’s strengths and you’ll fight fewer battles all season long.”
When you’re evaluating garden site conditions, also look at wind patterns, drainage after rain, and any areas where water pools. These details seem minor but can cause real problems once plants are in the ground.
For layout inspiration based on real-world site conditions, explore our vegetable garden layouts guide. And if you want to review the fundamental principles behind everything we’re covering, our garden planning basics article is worth reading alongside this one.
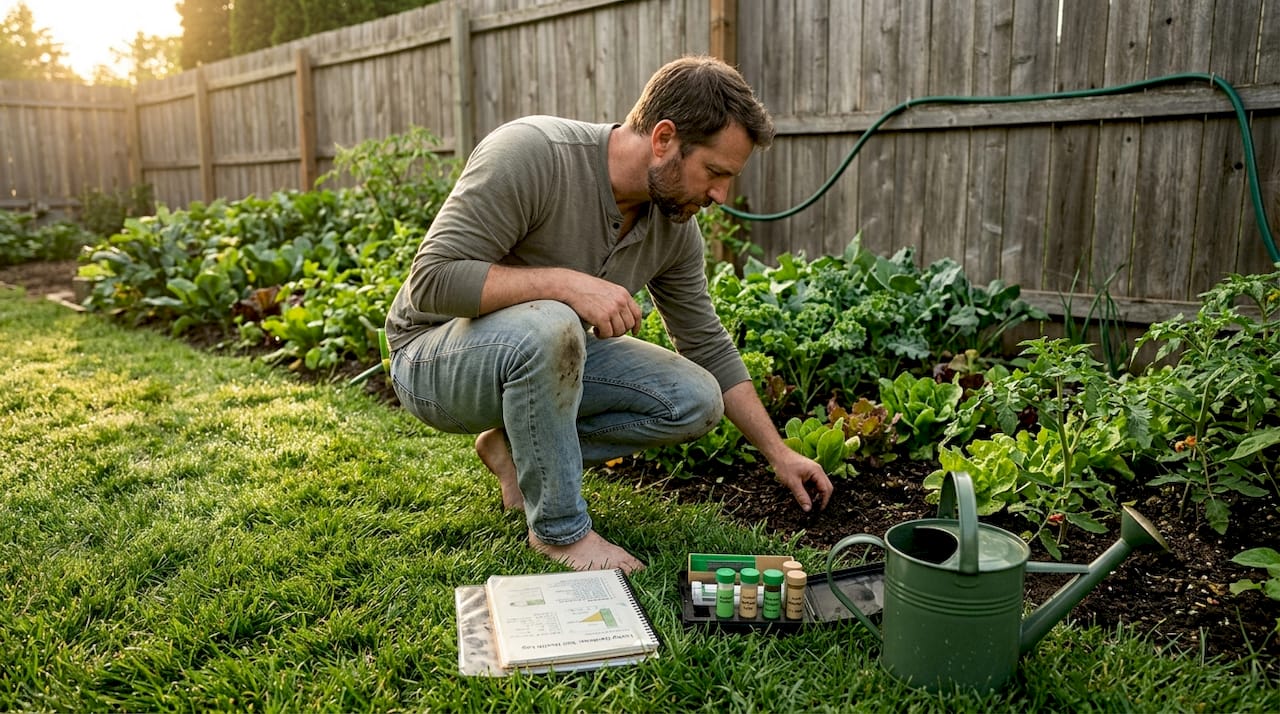
Pro Tip: If your soil test shows low nitrogen, mix in aged compost two to three weeks before planting so it has time to integrate. Don’t rush this step or your seedlings will struggle during their most vulnerable stage.
Step 2: Design beds, paths, and garden layout
With your site mapped and measured, next comes the creative part, designing your garden layout for efficiency and style.
Garden layout is where many beginners get overwhelmed. There are so many options that it’s easy to overthink it. The key is matching your layout choice to your goals, your available space, and how much time you want to spend on maintenance.
Your main layout options:
- Raised beds: Great for poor soil areas, easy on your back, and simple to manage. Fill them with a mix of topsoil, compost, and aged manure for rich, loose growing media.
- Traditional rows: Classic in-ground planting that works well for larger spaces and crops like corn, beans, or potatoes. Easier to use with rototillers and row covers.
- Container gardening: Perfect for patios, balconies, or areas with very poor native soil. Allows for easy repositioning based on sun and weather.
| Bed type | Best for | Maintenance level | Startup cost |
|---|---|---|---|
| Raised beds | Small spaces, poor soil | Low to medium | Medium to high |
| Traditional rows | Large plots, field crops | Medium | Low |
| Containers | Patios, renters, small yards | Medium | Low to medium |
| Keyhole beds | Water conservation, access | Low | Medium |
According to established gardening benchmarks, beds should be no wider than 4 feet for easy access, and growing areas need a minimum of 6 to 8 hours of direct sunlight for most crops to thrive. Succession planting, which means staggering plantings every 2 to 3 weeks, also keeps beds productive across more of the season rather than producing everything at once.
When planning paths, aim for at least 18 to 24 inches of clear walking space between beds. Narrower paths feel fine in spring but become frustrating when plants bush out in midsummer. For efficient watering and movement, try to keep beds parallel and orient them in a north-south direction so taller crops don’t shade shorter neighbors. Visit our bed and path placement tips resource for more detailed layout advice.
For specific guidance on fitting more into less space, check out our article on spacing vegetables for yield. It covers companion planting, square-foot gardening, and interplanting strategies that can nearly double output from the same amount of ground. You can also revisit our garden layouts guide for visual examples of different configurations.
Step 3: Plan planting, watering, and ongoing care
Once you have your garden structure, it’s time to plan what goes into those beds, and how to keep everything thriving season after season.
Choosing your plants wisely:
Match every plant to your assessed site conditions. Tomatoes and peppers need heat and 8 or more hours of sun. Lettuce, spinach, and kale tolerate partial shade and actually prefer cooler temperatures. Place sun-loving crops in your sunniest zones and shade-tolerant ones where light is limited. Check your seed packets or plant tags for specific spacing and depth requirements.
-
Draft a planting schedule. Work backward from your last frost date to calculate when to start seeds indoors and when to transplant. Most extension offices publish regional frost date calendars for free.
-
Lay out your water system. Drip irrigation and soaker hose systems deliver water directly to the root zone, which means less evaporation, fewer weeds (because you’re not watering open soil), and lower water bills. They’re also easier to automate with a simple timer.
-
Plan your mulching strategy. Apply 2 to 3 inches of organic mulch, like straw, wood chips, or shredded leaves, around your plants after they’re established. Mulch retains soil moisture, moderates soil temperature, and suppresses weed growth naturally.
-
Set up a pest prevention routine. Walk your garden at least twice a week in the early growing season to catch problems early. Look under leaves for eggs and larvae, watch for yellowing or unusual spots, and remove affected plant material before issues spread.
For detailed advice on keeping your plants properly hydrated without overwatering or underwatering, visit our garden watering tips guide. And if you want to keep chemicals out of your garden, our natural pest control article walks you through effective, eco-friendly options that really work.
Pro Tip: Group plants with similar water needs together in the same bed. This is called hydrozoning, and it prevents overwatering drought-tolerant plants or underwatering thirsty ones when you run a single irrigation line through mixed plantings.
Step 4: Review, troubleshoot, and adjust your plan
Before you start digging, pause to review your plan for any weak spots or missed details.
Even a well-researched garden plan can have gaps. Taking 30 minutes to walk through your sketch critically before planting day can save you weeks of frustration later. Here’s what to look for.
Common issues to check for:
- Overcrowding: Did you account for each plant’s mature size? A tomato listed as “bush” type still needs 24 to 36 inches of space. Check every plant’s spacing requirements and pencil them in on your map.
- Sunlight mismatches: Are your sun-loving crops sitting in an area that gets afternoon shade from a fence or tree? Go back to your base map and confirm light zones align with plant needs.
- Access problems: Can you comfortably reach every part of every bed without stepping on soil? If not, adjust path placement or redesign wider beds into two narrower ones.
- Water reach: Does your irrigation layout actually cover all the beds? Trace your hose line on the map and check for any uncovered corners.
- Missing succession plantings: Have you planned for what goes into a bed after early crops like peas or lettuce are done? Leaving beds empty wastes growing season weeks.
“A plan that gets adjusted is still a plan. The goal is not perfection on paper; it’s preparation for the reality waiting in the soil.”
Maintaining flexibility in watering and pest management strategies as conditions change is one of the most underrated skills in home gardening. Your plan is a guide, not a contract. Keep notes in your garden journal as the season progresses so you know what to change next year.
Our vegetable garden planning resource includes printable worksheets that make this review process much easier to work through systematically.
A seasoned gardener’s take: Why adapting beats perfection
After you’ve checked your plan, here’s something even the pros rarely say out loud.
No garden plan survives first contact with the actual garden. A late frost, a groundhog that discovers your lettuce, three weeks of drought when you expected average rainfall: every season throws something unexpected at you. Experienced gardeners don’t avoid surprises; they build in the expectation that surprises will happen.
The gardeners who thrive long-term are the ones who treat their layout and crop choices as ongoing experiments rather than fixed decisions. They take notes mid-season about what worked and what didn’t, they shift plants around based on what the space revealed, and they accept that a “failed” bed in year one is just data for a better bed in year two.
Perfecting your plan before planting gives you a massive head start. But the real skill is being willing to adjust without feeling like you failed. That mindset shift, from “I need to get this right” to “I’m learning what my space needs,” is what separates one-season gardeners from lifelong ones. For more ideas on how to keep your outdoor space feeling fresh and creative each year, our garden inspiration article is full of practical, achievable ideas.
Document your outcomes. Take photos of your beds at planting, midseason, and harvest. Write brief notes about weather, what you planted, what you watered, and what you observed. Future-you will be deeply grateful for that record when it’s time to plan next season.
Ready to bring your garden plan to life?
No matter how your plan evolves, the right support and resources can make all the difference in your new gardening journey.
At Lushy Gardens, we’ve built a growing library of practical guides designed to support you at every stage, whether you’re just finding your footing or refining a system that’s worked for years. Start with our gardening basics for beginners if you want a solid overview of everything from seed selection to soil care. Use our garden care checklist to build a reliable weekly routine that keeps your beds healthy without feeling overwhelming. And when the seasons shift, our seasonal garden maintenance guide will walk you through exactly what needs attention each month. Your garden journey is just beginning, and we’re here for every step of it.
Frequently asked questions
What is the first step in planning a home garden?
The first step is to assess your site, noting sun exposure, soil type, water access, and any permanent structures before sketching a base map.
How wide should garden beds be for easy access?
Beds no wider than 4 feet allow you to reach the center comfortably from both sides without stepping on the soil and compacting it.
What’s the recommended minimum sunlight for vegetable gardens?
Most vegetables need a minimum of 6 to 8 hours of direct sun per day; anything less typically leads to weak plants and poor yields.
How do I plan watering for my garden beds?
Plan access to water by marking faucet locations on your base map, then consider a drip or soaker hose system for precise, low-waste irrigation.
Can I change my garden plan during the season?
Absolutely. Adapting your plan in response to real-world conditions, from unexpected pests to a shady corner you misjudged, is a normal and healthy part of gardening that leads to better results every year.
Recommended
- Step-by-step beginner vegetable garden setup guide – Lushy Gardens
- Vegetable Garden Planning Made Easy: A Step-by-Step Guide – Lushy Gardens
- Vegetable gardening basics: step-by-step guide for beginners – Lushy Gardens
- Simple Garden Design Ideas for Beginners – Lushy Gardens

I’m Eleanor, a seasoned gardener with over three decades of experience tending to Mother Nature’s creations. Through Lushy Gardens, I aim to share my wealth of knowledge and help fellow plant enthusiasts uncover the wonders of gardening. Let’s dive into this journey together, one leaf at a time.


