
Table of Contents
Many beginners lose entire seed batches by planting too early in cold, wet soil, causing seeds to rot before they germinate. Outdoor seed planting demands attention to timing, soil preparation, and proper technique to achieve strong, healthy seedlings. This guide walks you through each critical step, from understanding frost dates to watering newly sown seeds, so you can confidently grow vegetables and flowers directly in your garden and avoid costly mistakes.
Key takeaways
| Point | Details |
|---|---|
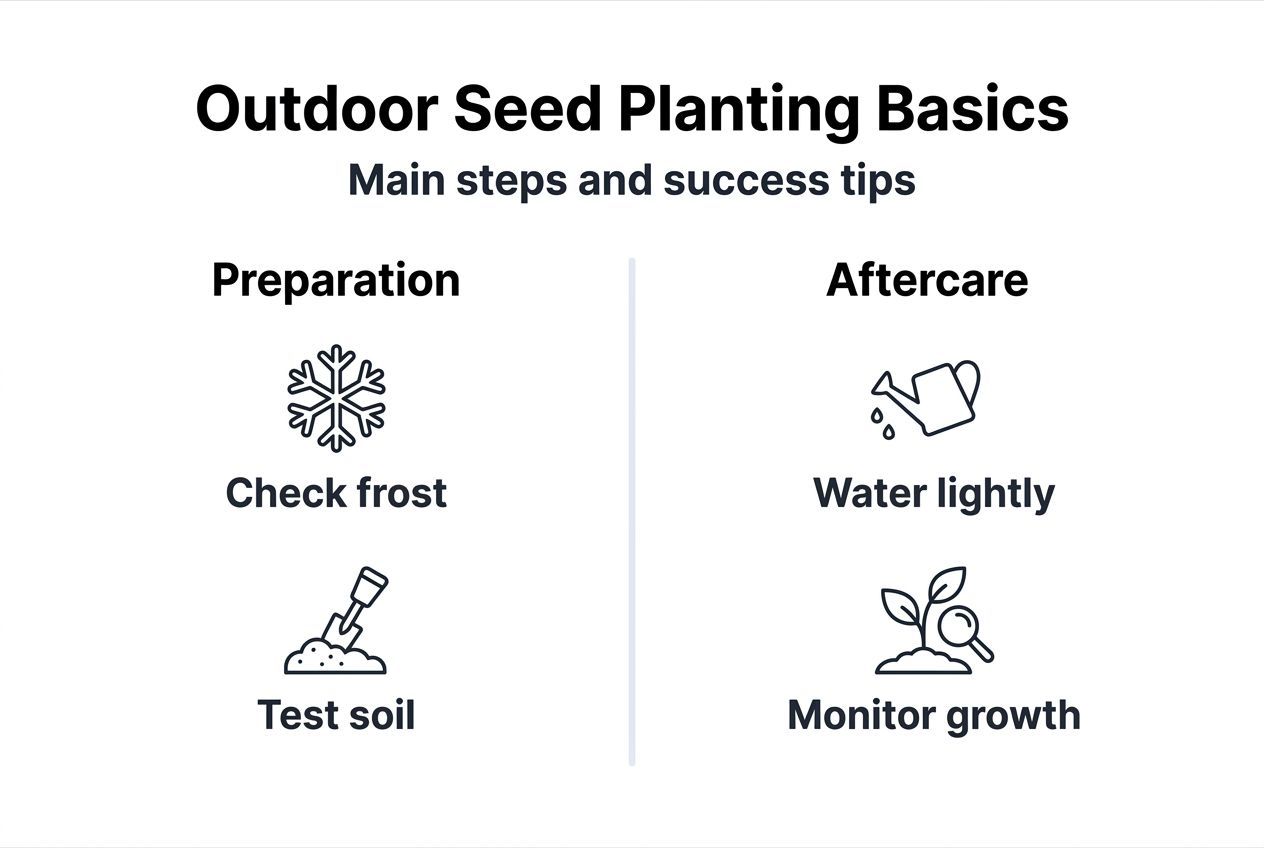
| Timing matters | Plant after last frost when soil warms to 50-70°F to prevent seed rot and damping-off disease. |
| Soil prep is essential | Clear debris, loosen soil, and add 2 inches of organic compost for better germination and root development. |
| Depth and spacing count | Sow seeds 2-3 times their size deep and follow spacing guidelines to reduce competition and disease. |
| Water carefully | Keep soil moist but not waterlogged; adjust frequency based on weather to avoid fungal problems. |
| Avoid common errors | Planting too early, overwatering, and poor soil preparation cause most seedling failures. |
Introduction to outdoor seed planting
Direct sowing means planting seeds directly into garden soil outdoors, skipping the indoor seed starting stage. This method saves money on seed trays, grow lights, and potting mix while producing plants with stronger root systems naturally adapted to your local climate. Seeds germinate in the same environment where they will mature, eliminating transplant shock entirely.
Vegetables like carrots, radishes, beans, and peas thrive when direct sown because their roots develop without container restrictions. Many flowers, including sunflowers, zinnias, and marigolds, also flourish from outdoor sowing. Outdoor germination creates hardier plants that tolerate temperature fluctuations and wind better than their greenhouse-raised counterparts.
Direct sowing eliminates the need for hardening off, the gradual process of acclimating indoor-started plants to outdoor conditions. You can apply these principles to simple garden design ideas or even growing vegetables in pots when space is limited.
Key benefits of outdoor seed planting include:
- Lower costs compared to buying transplants or indoor supplies
- Stronger, deeper root systems that access water and nutrients more efficiently
- Plants naturally adapted to local soil microbes and weather patterns
- Reduced risk of transplant shock and root disturbance
- Ideal for crops that dislike root disturbance, like carrots and dill
“Direct sowing seeds outdoors eliminates the need for indoor seed starting supplies and helps plants adapt naturally to their environment, leading to stronger growth.”
Understanding outdoor germination benefits helps you decide which plants to start this way versus indoors.
Prerequisites and tools needed before you start
Successful outdoor seed planting begins with selecting quality seeds specifically labeled for direct sowing. Check seed packets for instructions confirming outdoor planting suitability and note any special requirements. Fresh seeds from reputable suppliers germinate more reliably than old or poorly stored stock.
Essential tools and supplies include:
- Garden trowel for digging small furrows and covering seeds
- Garden rake to level soil and create smooth seedbeds
- Watering can with a fine rose attachment for gentle watering
- Soil thermometer to verify ground temperature
- Organic compost or aged manure to enrich soil
- Garden stakes and string to mark rows
- Seed labels to track what you planted and where
Understanding your local climate zone and frost dates prevents planting too early or too late. Your region’s last spring frost date signals when cold-sensitive seeds can safely go into the ground. Hardy vegetables like peas and spinach tolerate cool soil, while warm-season crops like beans and squash need warmer conditions.
Soil type dramatically affects drainage, nutrient availability, and root penetration. Clay soils hold moisture but drain slowly, while sandy soils drain fast but dry out quickly. Test your soil texture by squeezing a handful: if it forms a tight ball, you have clay; if it falls apart immediately, it’s sandy. Preparing soil for planting healthy growth ensures optimal seedbed conditions.
| Tool/Material | Purpose | Quality Indicator |
|---|---|---|
| Seeds | Plant propagation | Fresh, labeled for outdoor sowing, high germination rate |
| Compost | Soil enrichment | Dark, crumbly, earthy smell |
| Trowel | Digging furrows | Sturdy blade, comfortable grip |
| Watering can | Gentle irrigation | Fine rose head for mist-like spray |
Step 1: timing your outdoor seed planting
Timing determines whether your seeds germinate successfully or rot in cold, wet soil. The last spring frost date in your area marks when freezing temperatures typically end, signaling safe planting for tender crops. Hardy vegetables like lettuce and peas can go in 2-4 weeks before this date, while warm-season crops like tomatoes and peppers need soil temperatures above 60°F.
Soil temperature is crucial; seeds typically require warmth indicated by weed seedling emergence before direct sowing. When you see dandelions, chickweed, or other weeds sprouting, soil has warmed enough for many vegetable seeds. Most seeds germinate best when soil reaches 50-70°F, though specific crops have unique preferences.
Planting too early risks seed rot and damping-off disease, a fungal problem that kills seedlings at the soil line. Cold, waterlogged soil creates perfect conditions for these pathogens. Seeds sit dormant in hostile conditions, becoming vulnerable to decay before they can sprout.
Natural indicators beyond weed growth include:
- Oak leaves reaching the size of a mouse’s ear signal corn planting time
- Blooming forsythia bushes indicate pea planting season
- Dandelions flowering suggest beans can go in the ground
- Soil that no longer sticks to your boots when you walk on it
Pro Tip: Insert a soil thermometer 2-4 inches deep in the morning to get accurate readings. Take measurements for three consecutive days and average them. Your local cooperative extension service often publishes soil temperature data online, saving you the measurement step.
Consult when to plant vegetables for maximum yields or a seasonal vegetable planting chart midwest for regional guidance. This seed planting timing guide offers additional insights on matching seeds to seasons.
Step 2: prepare your soil and seedbed
Proper soil preparation creates the foundation for strong germination and healthy root development. Begin by clearing your planting area of debris, rocks, and existing weeds that compete for moisture and nutrients. Pull weeds by hand or use a hoe, removing roots to prevent regrowth.
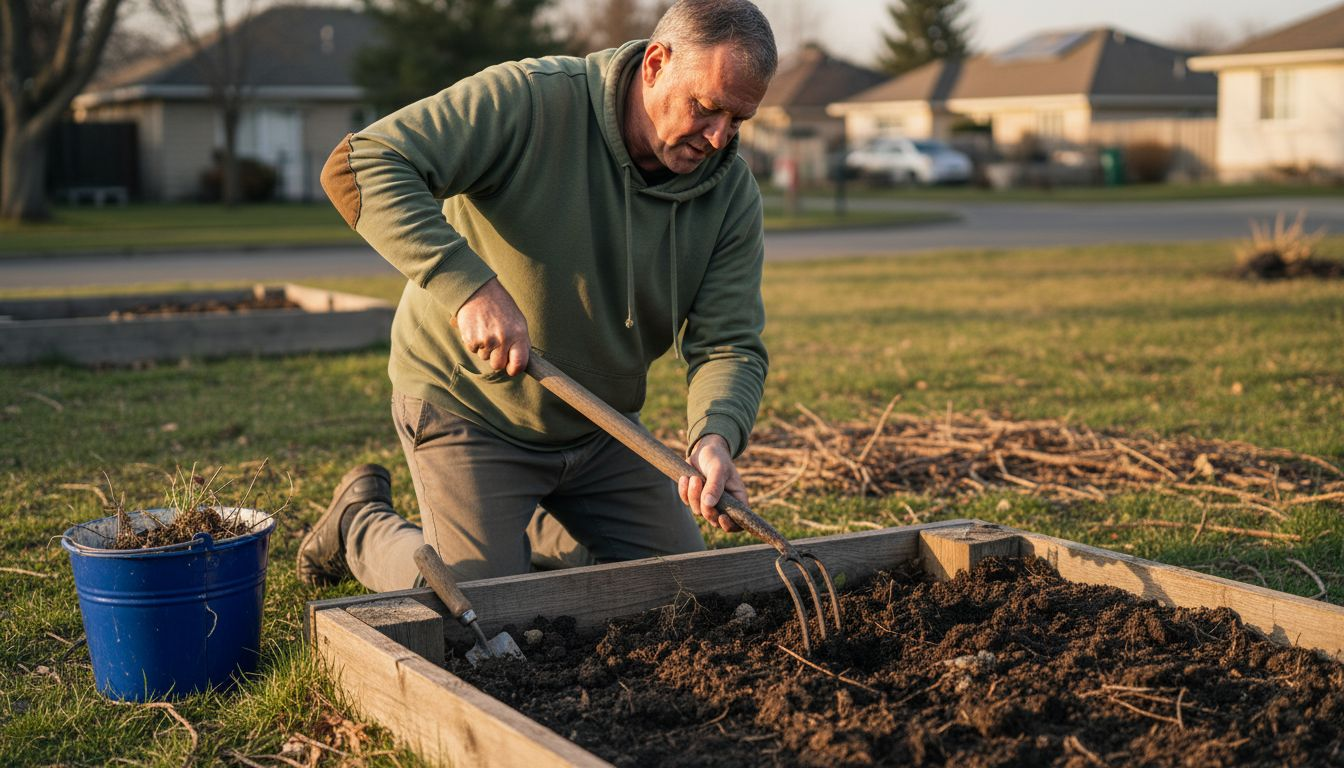
Loosen soil to a depth of 6-8 inches using a garden fork or tiller. Breaking up compacted layers improves aeration, drainage, and root penetration. Avoid working soil when it’s too wet; squeeze a handful and if water drips out or it forms a tight ball, wait a day or two until it dries slightly.
Incorporate at least 2 inches of organic compost across your planting area, mixing it thoroughly into the top 4-6 inches of soil. Compost adds nutrients, improves soil structure, and supports beneficial microbes that help seeds germinate. Well-rotted manure works equally well if compost isn’t available.
Follow these soil prep steps:
- Remove all weeds, rocks, and plant debris from the area
- Loosen soil 6-8 inches deep with a garden fork
- Spread 2 inches of compost evenly over the surface
- Mix compost into the top 4-6 inches of soil
- Rake the surface smooth and level
- Break up any remaining clumps larger than a marble
- Water lightly if soil is dry to settle it before planting
Check soil texture and moisture by picking up a handful. It should feel moist like a wrung-out sponge, crumbling easily when squeezed. If it’s dusty dry, water the area a day before planting. If it’s muddy, postpone planting until it dries to workable moisture.
Pro Tip: Never work soil when it’s saturated. Walking on or tilling wet soil compresses particles, destroying pore spaces that roots and water need. This compaction can take years to reverse and severely limits plant growth.
Proper preparing soil for planting healthy growth techniques ensure your seedbed supports vigorous germination.
Step 3: planting seeds with proper depth and spacing
Seed depth and spacing directly impact germination rates and seedling health. The general rule states to cover seeds 2-3 times their size, typically ranging from 1/4 inch for tiny seeds up to 1 inch for larger ones. Planting too deep deprives seeds of oxygen and light needed to sprout, while too shallow planting exposes them to drying out or being washed away.
Tiny seeds like lettuce, carrots, and most flowers need only 1/4 inch of soil cover. Medium seeds such as beets, chard, and cucumbers perform best at 1/2 inch depth. Large seeds including beans, peas, corn, and squash should go 1 to 1.5 inches deep. Always verify specific requirements on your seed packet.
| Seed Size | Example Seeds | Planting Depth | Typical Spacing |
|---|---|---|---|
| Tiny | Lettuce, carrots, petunias | 1/4 inch | 1-2 inches |
| Small | Radishes, beets, chard | 1/2 inch | 2-3 inches |
| Medium | Cucumbers, squash, zinnias | 1/2 – 3/4 inch | 6-12 inches |
| Large | Beans, peas, corn, sunflowers | 1 – 1.5 inches | 3-6 inches |
Spacing prevents overcrowding that leads to competition for light, water, and nutrients. Crowded seedlings grow weak and spindly, becoming vulnerable to diseases. Proper spacing also improves air circulation, reducing fungal problems.
Planting methods include:
- Drill sowing: Create shallow furrows with a stick or hoe handle, sprinkle seeds along the line, and cover with soil
- Broadcasting: Scatter seeds evenly over prepared soil, then rake lightly to cover
- Station sowing: Plant 2-3 seeds at specific intervals, thinning to the strongest seedling later
- Grid planting: Use string to mark squares and plant one seed per intersection
After sowing, gently firm soil over seeds with your hand or the back of a rake. This contact helps seeds absorb moisture and begin germination. Label rows immediately so you remember what you planted and where.
Step 4: watering and caring for newly planted seeds
Proper watering makes the difference between successful germination and total failure. Water newly sown seeds carefully to keep soil moist but not waterlogged, encouraging germination with frequency depending on weather conditions. Immediately after planting, water gently using a fine spray or mist setting to moisten the top 1-2 inches of soil without washing away seeds.
Maintain consistent moisture throughout the germination period by checking soil daily. Stick your finger into the soil; if the top inch feels dry, water gently. Seeds need constant moisture to soften their coats and trigger sprouting, but waterlogged soil cuts off oxygen and promotes damping-off disease.
Weather conditions dictate watering frequency:
- Hot, sunny days may require watering twice daily
- Cool, cloudy periods need watering every 2-3 days
- Rainy weather eliminates the need for supplemental water
- Windy conditions dry soil faster, increasing watering needs
Applying a thin layer of mulch after seeds sprout helps retain soil moisture and regulate temperature. Use finely shredded leaves, straw, or grass clippings spread 1/2 to 1 inch thick, keeping mulch away from seedling stems to prevent rot. Mulch also suppresses weed seeds that compete with your crops.
Monitor for signs of problems like seedlings falling over at the soil line, indicating damping-off disease from overwatering. Yellow or wilted seedlings suggest underwatering or poor drainage. Adjust your watering schedule based on what you observe.
Pro Tip: Water in the early morning so foliage dries before evening, reducing fungal disease risk. Use a watering can with a rose head or a hose with a mist nozzle to avoid disturbing seeds or washing them out of the soil. Never blast seedbeds with a strong stream.
Common mistakes and how to avoid them
Most seed planting failures stem from preventable errors that beginners make repeatedly. Common mistakes include sowing too early causing seed rot in cold soil, overwatering leading to damping-off disease, planting seeds too deep or shallow, and neglecting soil preparation. Understanding these pitfalls helps you avoid wasting seeds, time, and effort.
Sowing too early in cold, wet soil creates hostile conditions where seeds rot before germinating. Cold soil below 50°F for most vegetables slows or halts germination, leaving seeds vulnerable to decay and fungal attack. Wait until soil warms adequately and drains well before planting.
Overwatering ranks among the most destructive mistakes. Waterlogged soil suffocates seeds and promotes damping-off, a fungal disease that kills seedlings overnight by rotting stems at the soil line. Water just enough to keep soil moist like a wrung-out sponge, never soggy or puddled.
Incorrect planting depth prevents germination entirely. Seeds buried too deep exhaust energy reserves trying to reach light and often die before emerging. Seeds planted too shallow dry out or get exposed by rain, failing to establish roots. Always follow seed packet depth recommendations.
Neglecting soil preparation leaves seeds struggling in compacted, nutrient-poor ground. Hard soil restricts root growth and drainage, while depleted soil lacks the nutrients seedlings need for vigorous growth. Invest time loosening soil and adding compost before planting.
Mistakes to avoid:
- Planting before soil reaches proper temperature
- Watering too frequently or with heavy streams
- Ignoring seed packet depth and spacing instructions
- Skipping soil preparation steps
- Failing to thin overcrowded seedlings
- Planting in poorly drained areas that stay soggy
“Up to 70% of direct-sown seeds fail due to improper timing, incorrect depth, or poor watering practices. Following basic guidelines dramatically improves success rates.”
Learn from garden planning mistakes avoid pitfalls and gardening mistakes to avoid to prevent common errors across all aspects of gardening.
Expected results and success metrics
Understanding typical germination timelines and success indicators helps you recognize when things are going well or need adjustment. Expected germination times vary widely; lettuce seeds usually germinate in 7-10 days, peas in 10-14 days, and carrots up to 3 weeks. Warm soil speeds germination while cool conditions slow it, sometimes doubling expected timeframes.
Healthy seedling emergence shows consistent sprouting across your planting area within the expected window. Seedlings should appear vigorous with sturdy stems, standing upright rather than flopping over. Initial leaves (cotyledons) emerge first, followed by true leaves that resemble mature plant foliage.
Direct-sown plants typically show superior root development compared to transplants. Their taproots grow straight down without circling or binding, accessing deeper moisture and nutrients. This advantage translates to better drought tolerance and overall plant health throughout the growing season.
| Seed Type | Germination Time | Success Indicators | Typical Survival Rate |
|---|---|---|---|
| Lettuce | 7-10 days | Uniform emergence, dark green leaves | 70-80% |
| Radishes | 4-6 days | Fast sprouting, sturdy stems | 80-90% |
| Carrots | 14-21 days | Slow but steady emergence, ferny leaves | 60-70% |
| Beans | 7-10 days | Large cotyledons, rapid growth | 75-85% |
| Peas | 10-14 days | Climbing tendrils appear early | 70-80% |
| Sunflowers | 7-10 days | Tall, thick stems, large seed leaves | 75-85% |
Monitor progress daily once germination begins. Thin overcrowded seedlings when they develop their first true leaves, removing weaker plants to give strong ones proper spacing. Thinning feels wasteful but dramatically improves remaining plants’ vigor and yield.
Adjust care based on what you observe. Yellowing seedlings may need fertilizer or better drainage. Leggy, stretched seedlings indicate insufficient light or overcrowding. Wilting suggests underwatering or root problems requiring investigation.
Get the most from your garden with Lushy Gardens
Now that you understand outdoor seed planting fundamentals, explore our complete gardening basics for beginners guide to build your skills across all gardening areas. Our seasonal garden maintenance step by step guide helps you keep plants thriving throughout the year with timely care tasks.
Whether you’re starting your first vegetable patch or expanding into flower beds, our simple garden design ideas provide inspiration for layouts that maximize space and productivity. Lushy Gardens offers practical advice tailored to home gardeners who want real results without complicated techniques or expensive inputs.
Frequently asked questions
How deep should I plant different seeds outdoors?
Plant seeds at a depth about 2-3 times the seed’s size, typically from 1/4 inch for tiny seeds up to 1 inch for larger seeds. Follow seed packet instructions for best results, as some seeds have unique requirements. Correct depth ensures seeds get enough oxygen and moisture to germinate without struggling to reach the surface.
When is the best time to plant seeds outdoors in my area?
Check your last spring frost date to avoid planting cold-sensitive seeds too early. Observe soil temperature and local weed seedlings as natural indicators to start planting. Hardy crops can go in 2-4 weeks before the last frost, while warm-season vegetables need soil above 60°F.
How often should I water newly planted seeds outdoors?
Water gently immediately after sowing to moisten soil evenly. Keep soil consistently moist but not waterlogged, adjusting frequency based on weather conditions. Check daily by feeling the top inch of soil; water when it starts to dry out, typically every 1-3 days depending on temperature and rainfall.
What are common mistakes to avoid when planting seeds outdoors?
Avoid sowing too early in cold soil, overwatering, planting too deep or shallow, and neglecting soil prep. Proper timing, soil care, and watering prevent most seed failures. Wait for adequate soil warmth, prepare a loose and fertile seedbed, and maintain consistent moisture without waterlogging to maximize germination success.
Recommended
- Spring Garden Preparation: Steps for a Thriving 2026 Garden – Lushy Gardens
- Simple Garden Design Ideas for Beginners – Lushy Gardens
- Growing Vegetables in Pots: A Step-by-Step Success Guide – Lushy Gardens
- 8 Essential Organic Gardening Tips for Beginners – Lushy Gardens

I’m Eleanor, a seasoned gardener with over three decades of experience tending to Mother Nature’s creations. Through Lushy Gardens, I aim to share my wealth of knowledge and help fellow plant enthusiasts uncover the wonders of gardening. Let’s dive into this journey together, one leaf at a time.


